File sharing has never been this easy. Grab your Apple device now and learn how AirDrop works.
Table of Contents:
What is AirDrop?
How does AirDrop work?
How to use AirDrop
How to turn on AirDrop on Mac
How to turn on AirDrop on iPhone or iPad
How to turn off AirDrop
What is AirDrop?
AirDrop is a feature in the iOS and macOS that enables wireless transfer of files between Macs, iPhones, and iPads. Aside from photos and videos, you can also send and receive documents, websites, locations, and more information through this Apple service.
How Does AirDrop Work?
AirDrop uses both Bluetooth LE and Wi-Fi to wirelessly transfer data. The Bluetooth LE manages the broadcast, discovery, and negotiation of connections, while the point-to-point Wi-Fi facilitates the transfer of data.
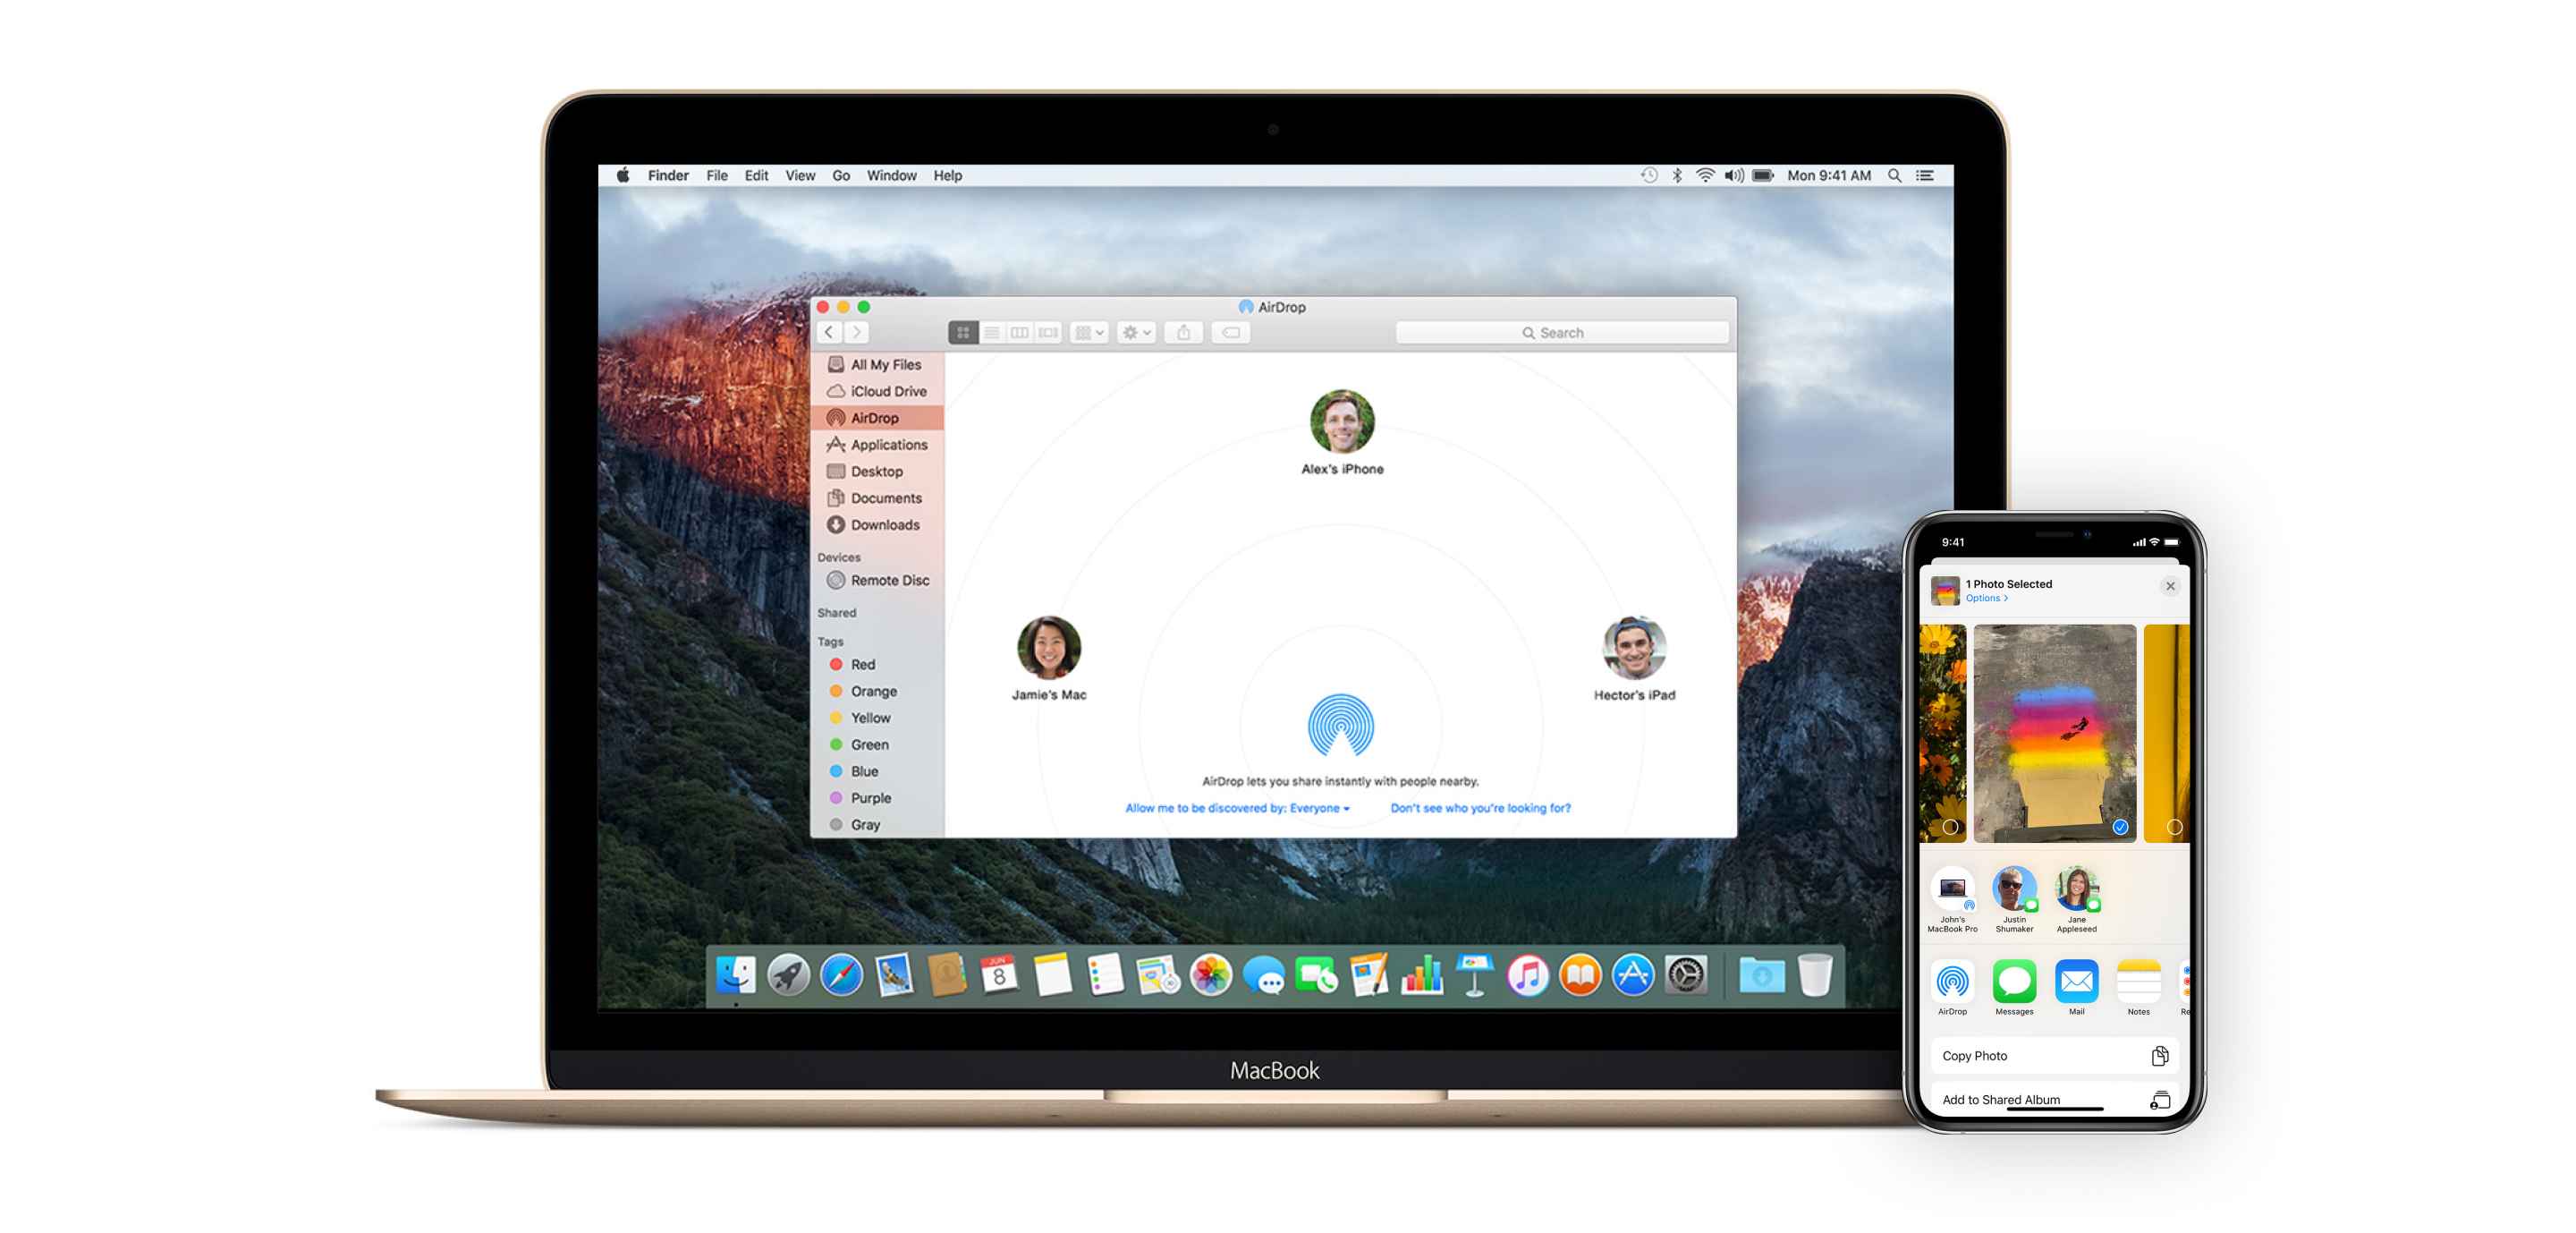
Only Apple devices can use this feature, and they have to be close enough to each other to send and receive data. If they’re beyond their Bluetooth and Wi-Fi ranges, they can’t detect each other. Also, you need to be logged into your iCloud account for AirDrop to work.
How to Use AirDrop
Using AirDrop is easy. Just make sure that both devices have Wi-Fi and Bluetooth on and are within range. Also, do turn off Personal Hotspot on both devices.
Sending files to other devices
Transferring files is as easy as opening an app, tapping the Share button, then tapping on the AirDrop user you’re sending the files to. If you’re sending photos, just swipe left or right on the Photos app to select multiple photos.
Receiving files from other devices
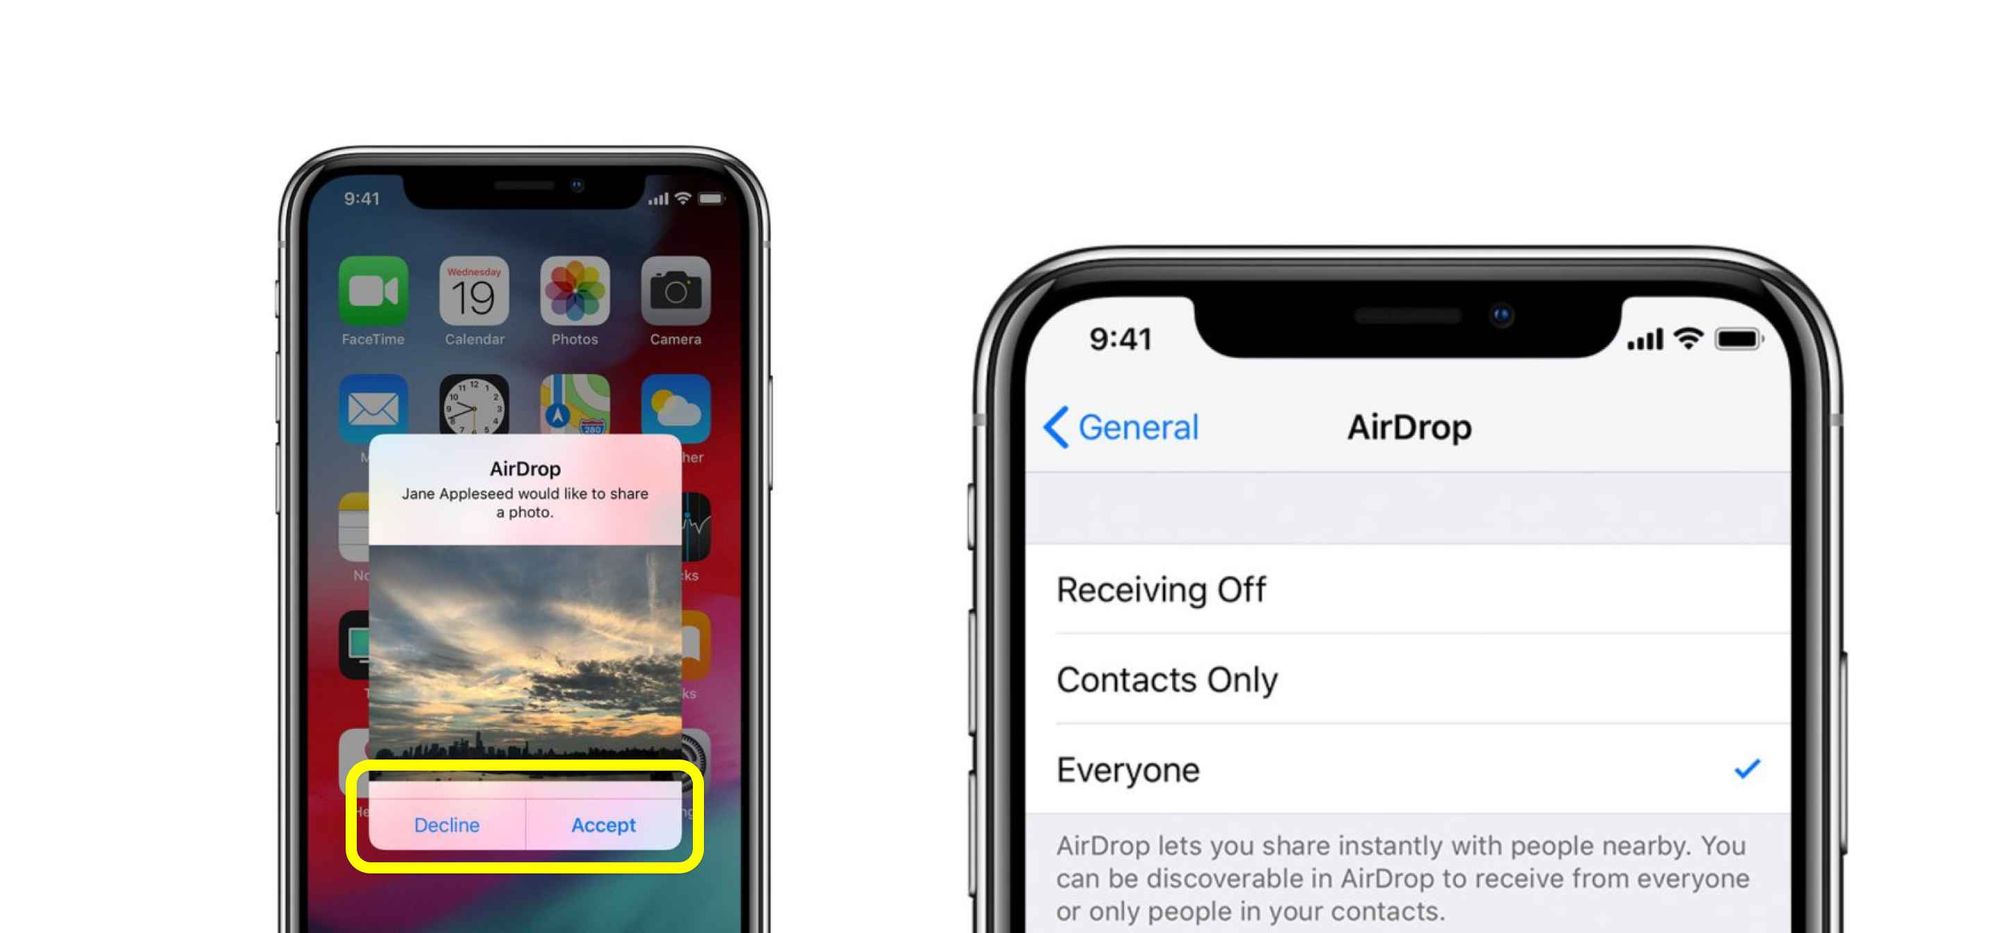
An alert with a preview pops up when someone sends you a file on AirDrop. Tap Accept if you want to receive the file. AirDrop receives the file through the same app it was sent from. So, if the other device sends you photos from the Photos app, clicking Accept will open your own Photos app. When you receive an app link, AirDrop opens this link in the App Store.
Transferring files to your own devices
When transferring files among your own devices, AirDrop automatically accepts the files if those devices are signed into the same Apple ID.
Read on for the step-by-step instructions for specific Apple devices.
Using AirDrop on Mac
How to turn on AirDrop on Mac
-
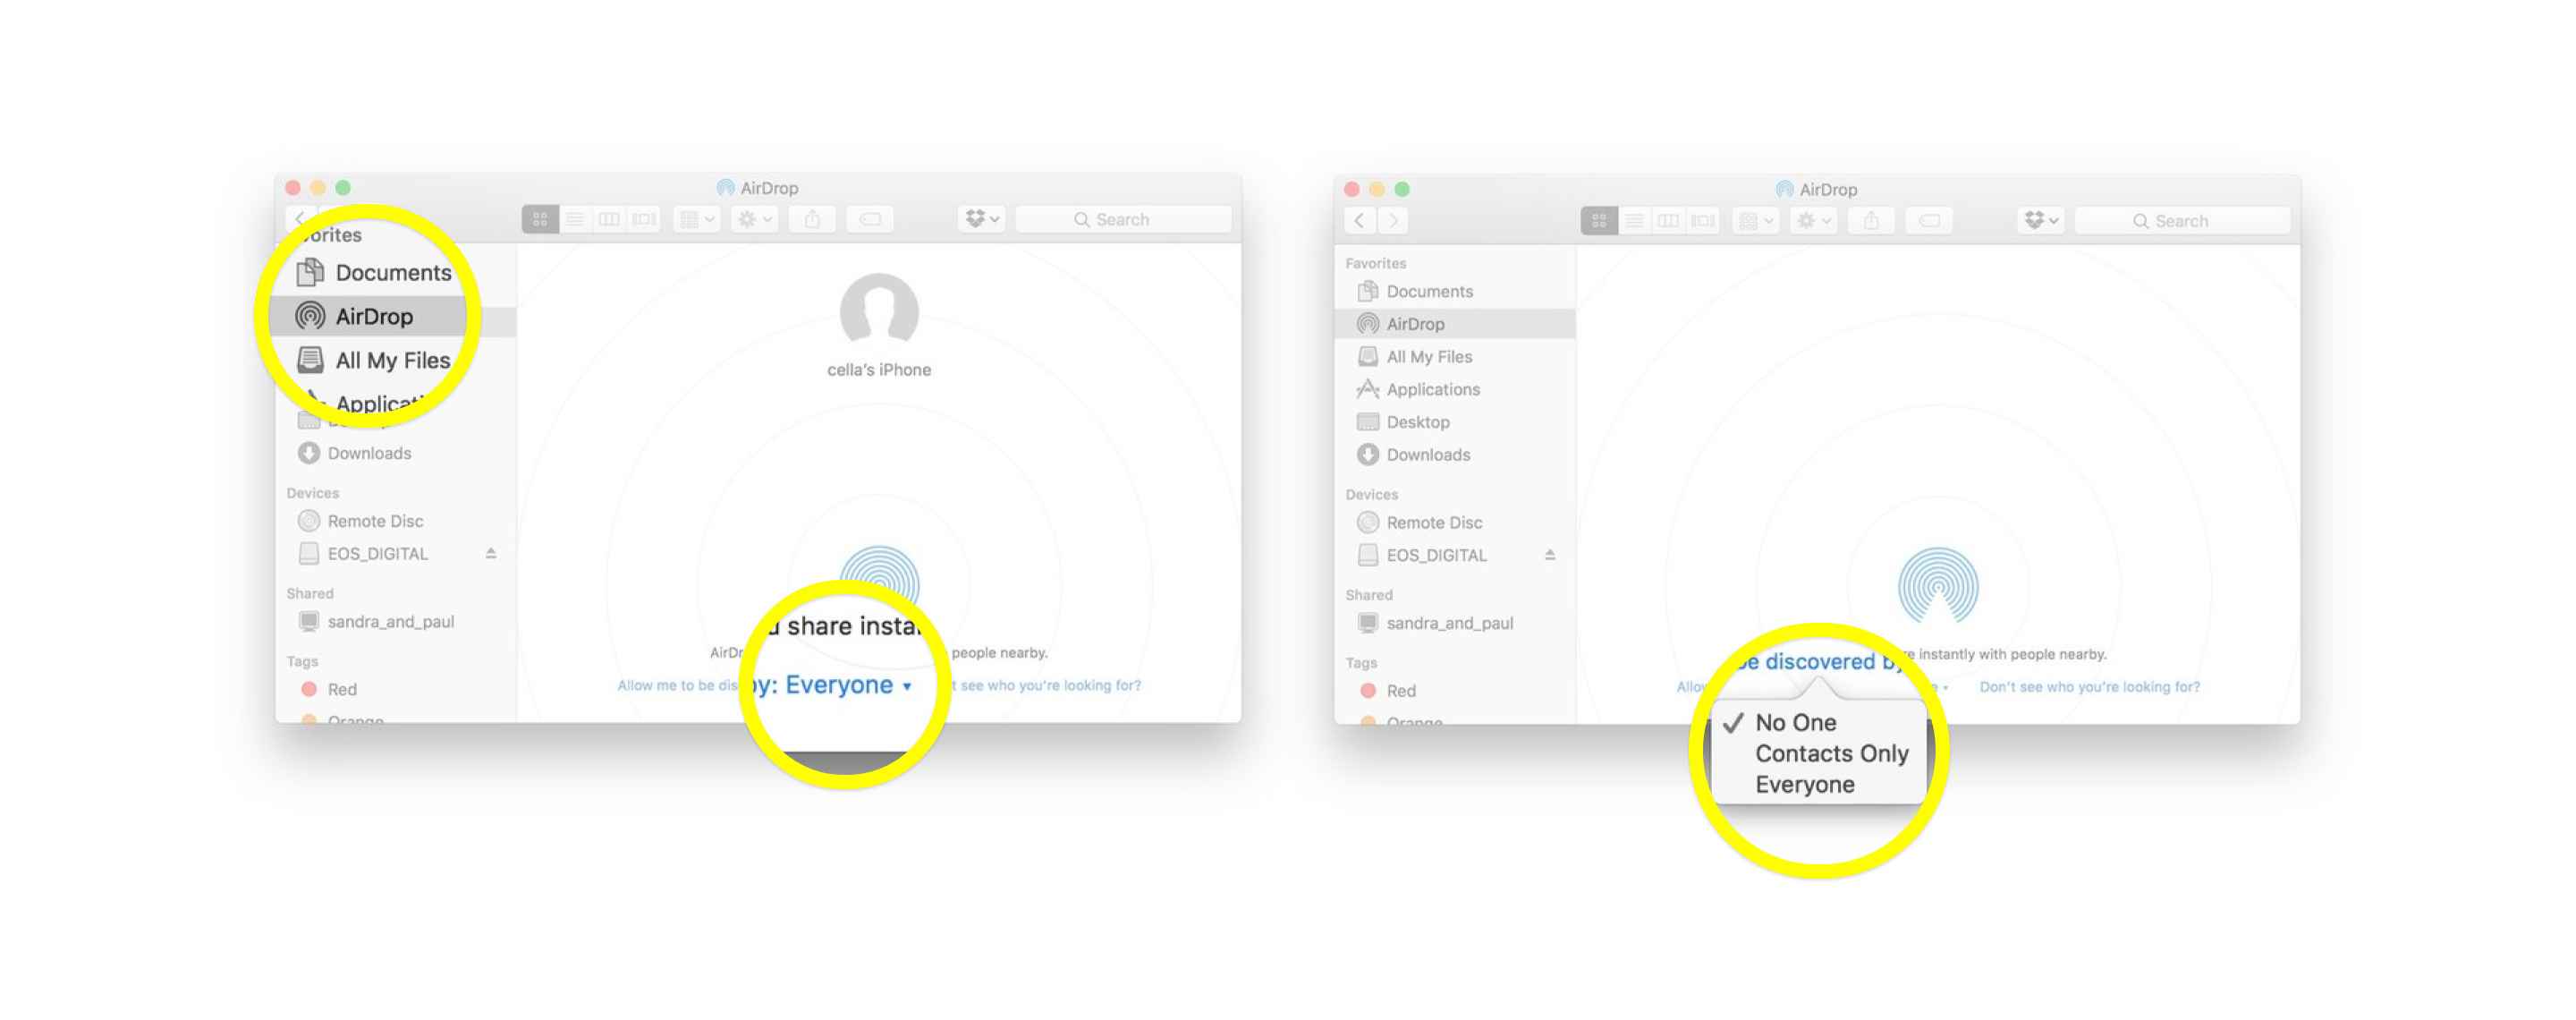
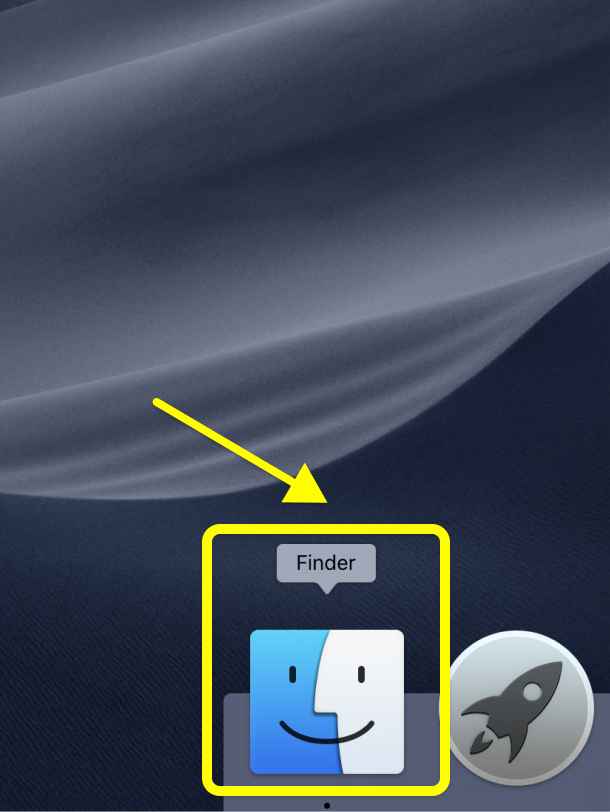 1. Launch the Finder.
-
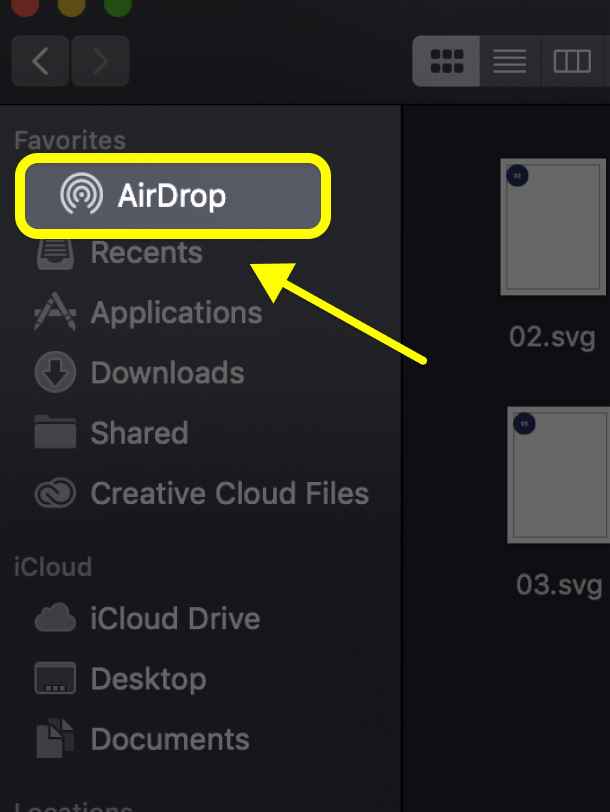 2. Click on AirDrop.
-
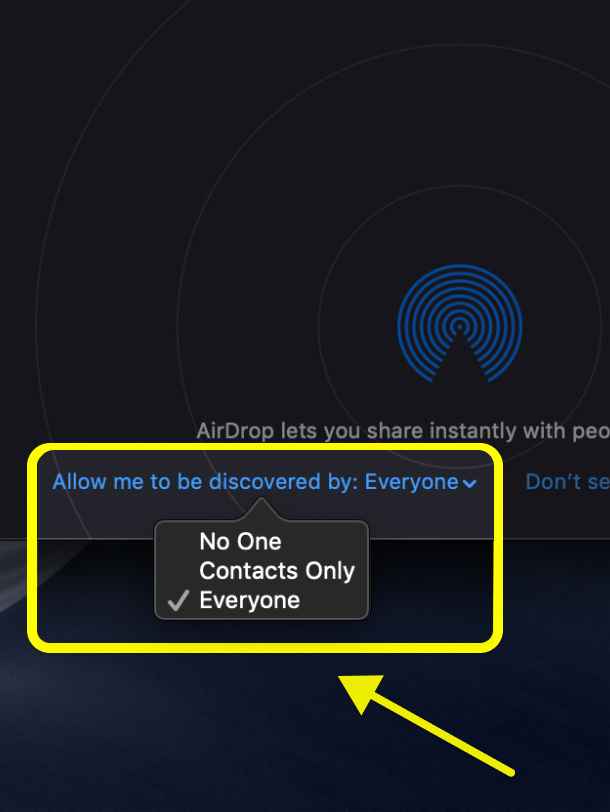 3. Select 'Contacts Only' or ‘Everyone’ to choose who can access your device.
Sharing files through Finder
- Launch Finder.
- Go to the menu bar in Finder and Airdrop
- Search for your recipient in the AirDrop window.
- Drag the files you want to send to the AirDrop user in the window.
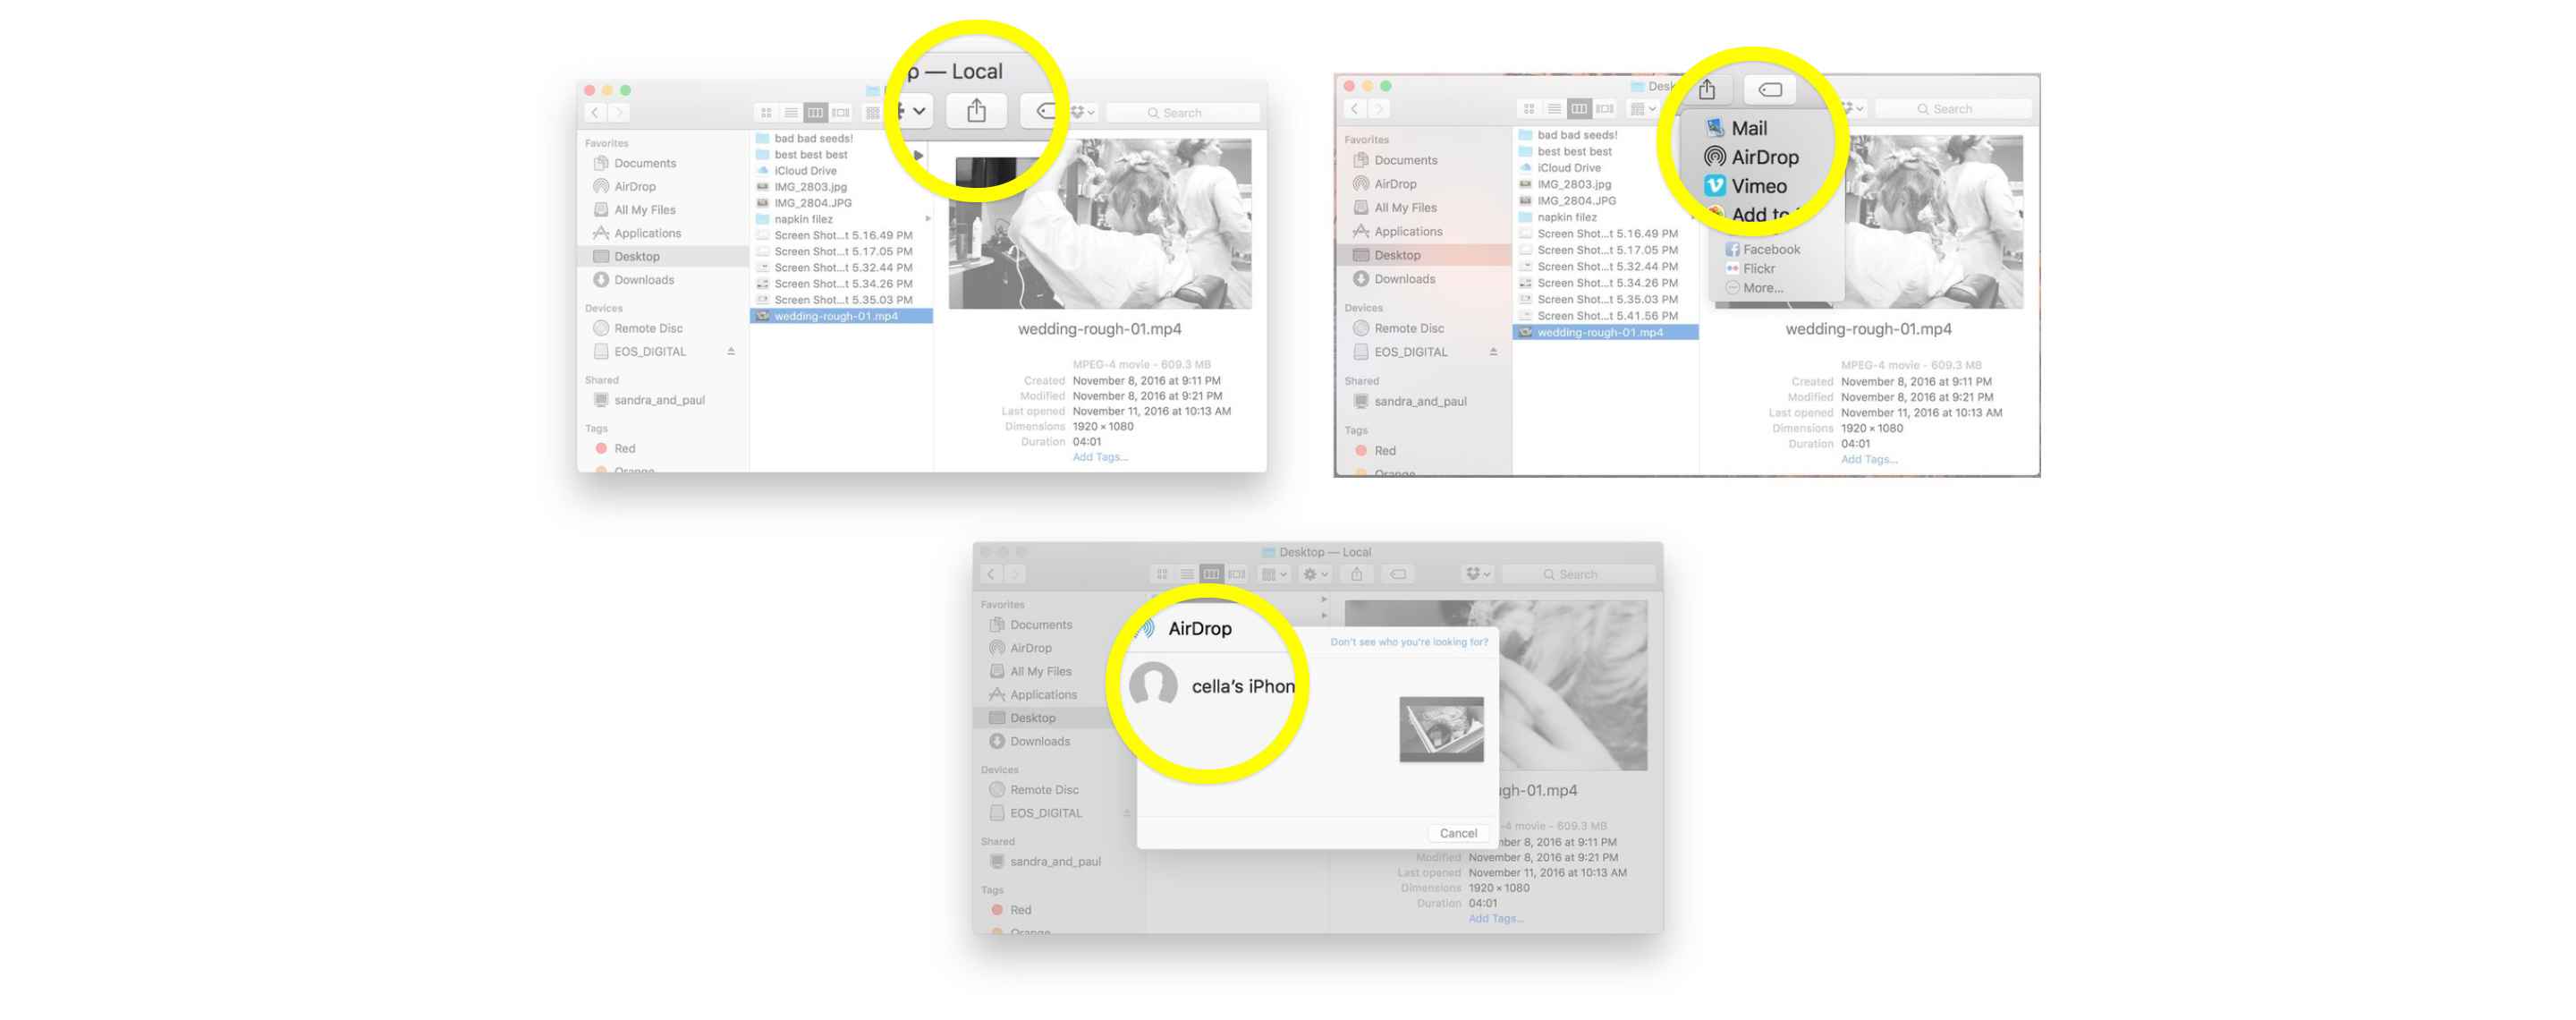
Sharing files using the Share feature
- Open the file you want to transfer.
- Click the Share icon.
- Choose AirDrop from the list of sharing options.
- Select the recipient from the AirDrop sheet.
- Click Done once the file has been sent and accepted.
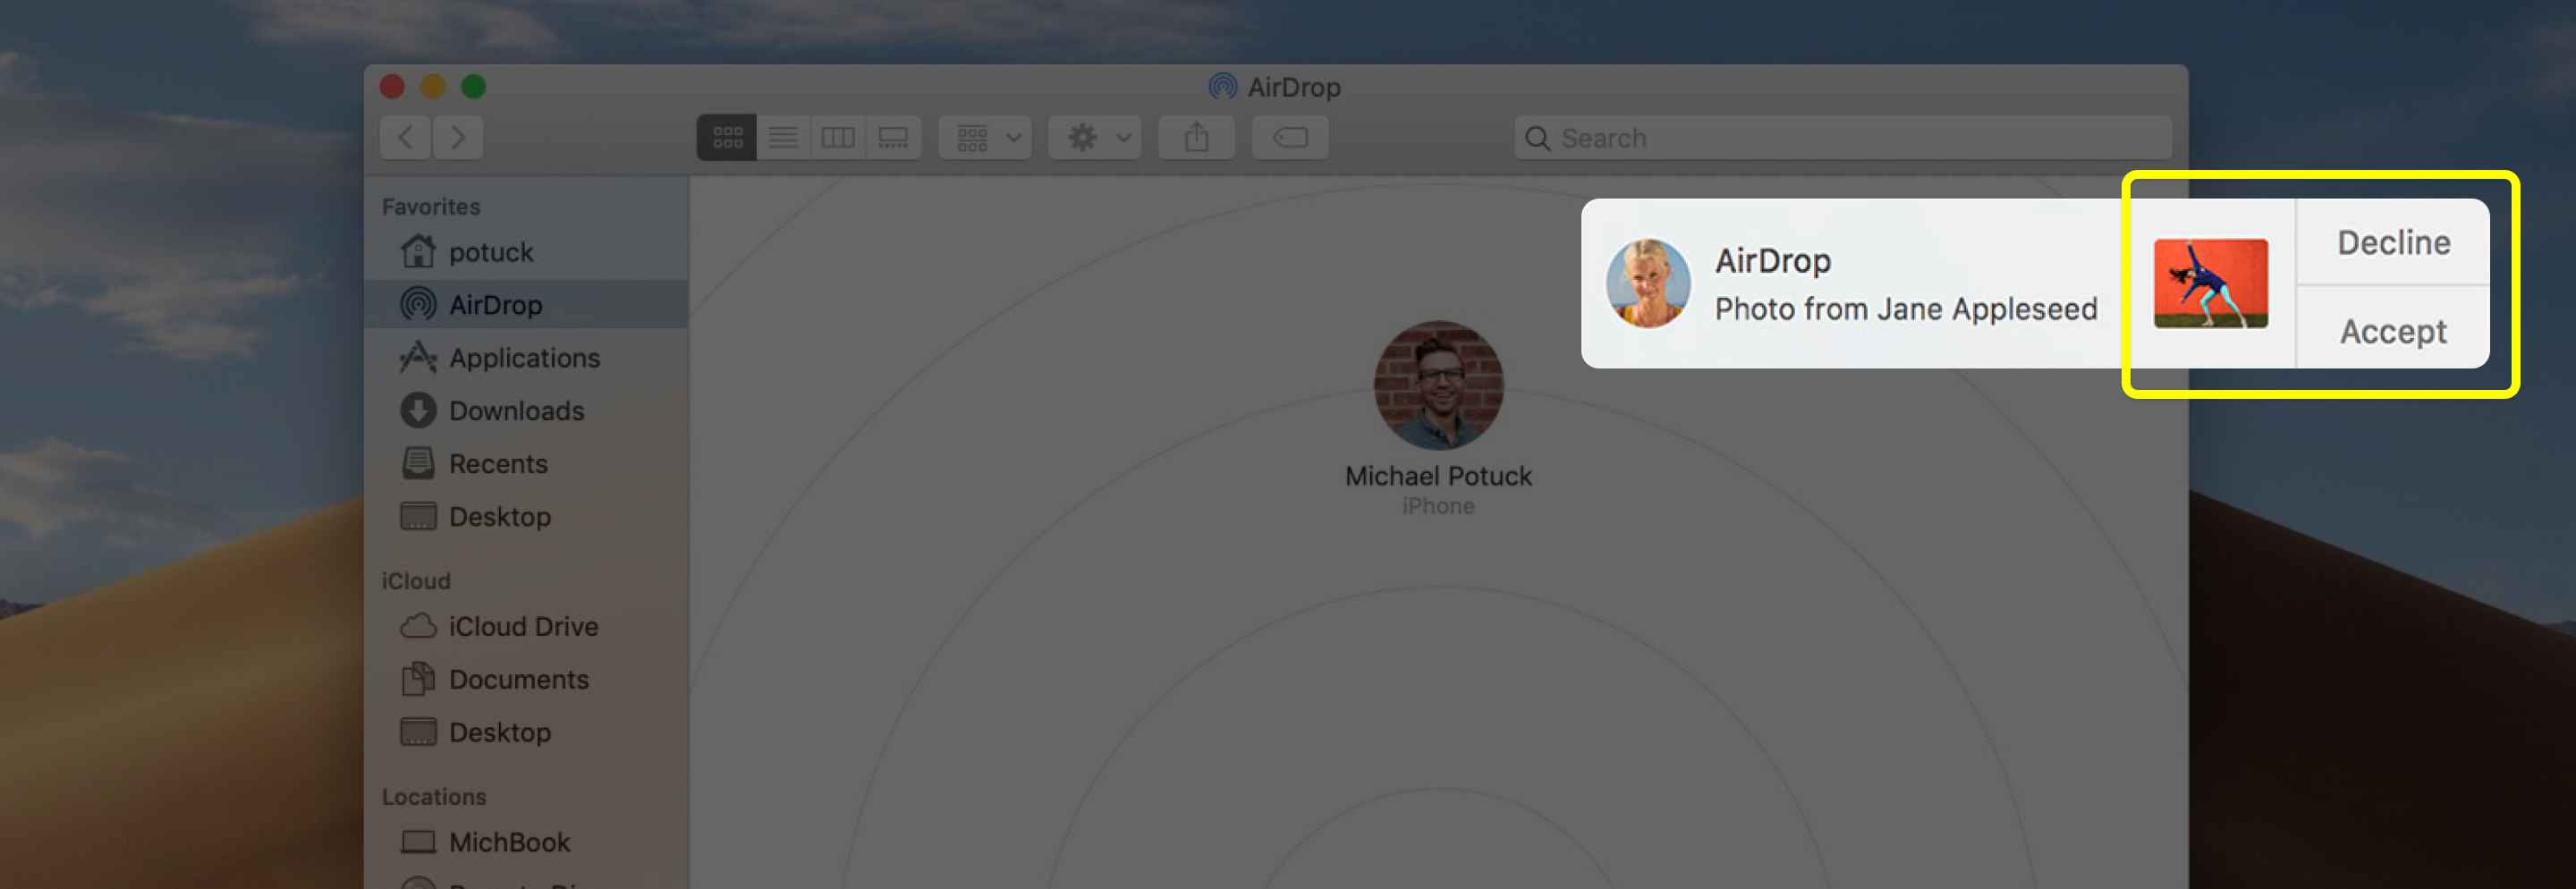
Receiving files
- Wait for the prompt.
- Click Accept.
- Check the files in the Downloads folder.
Using AirDrop on iPhone or iPad
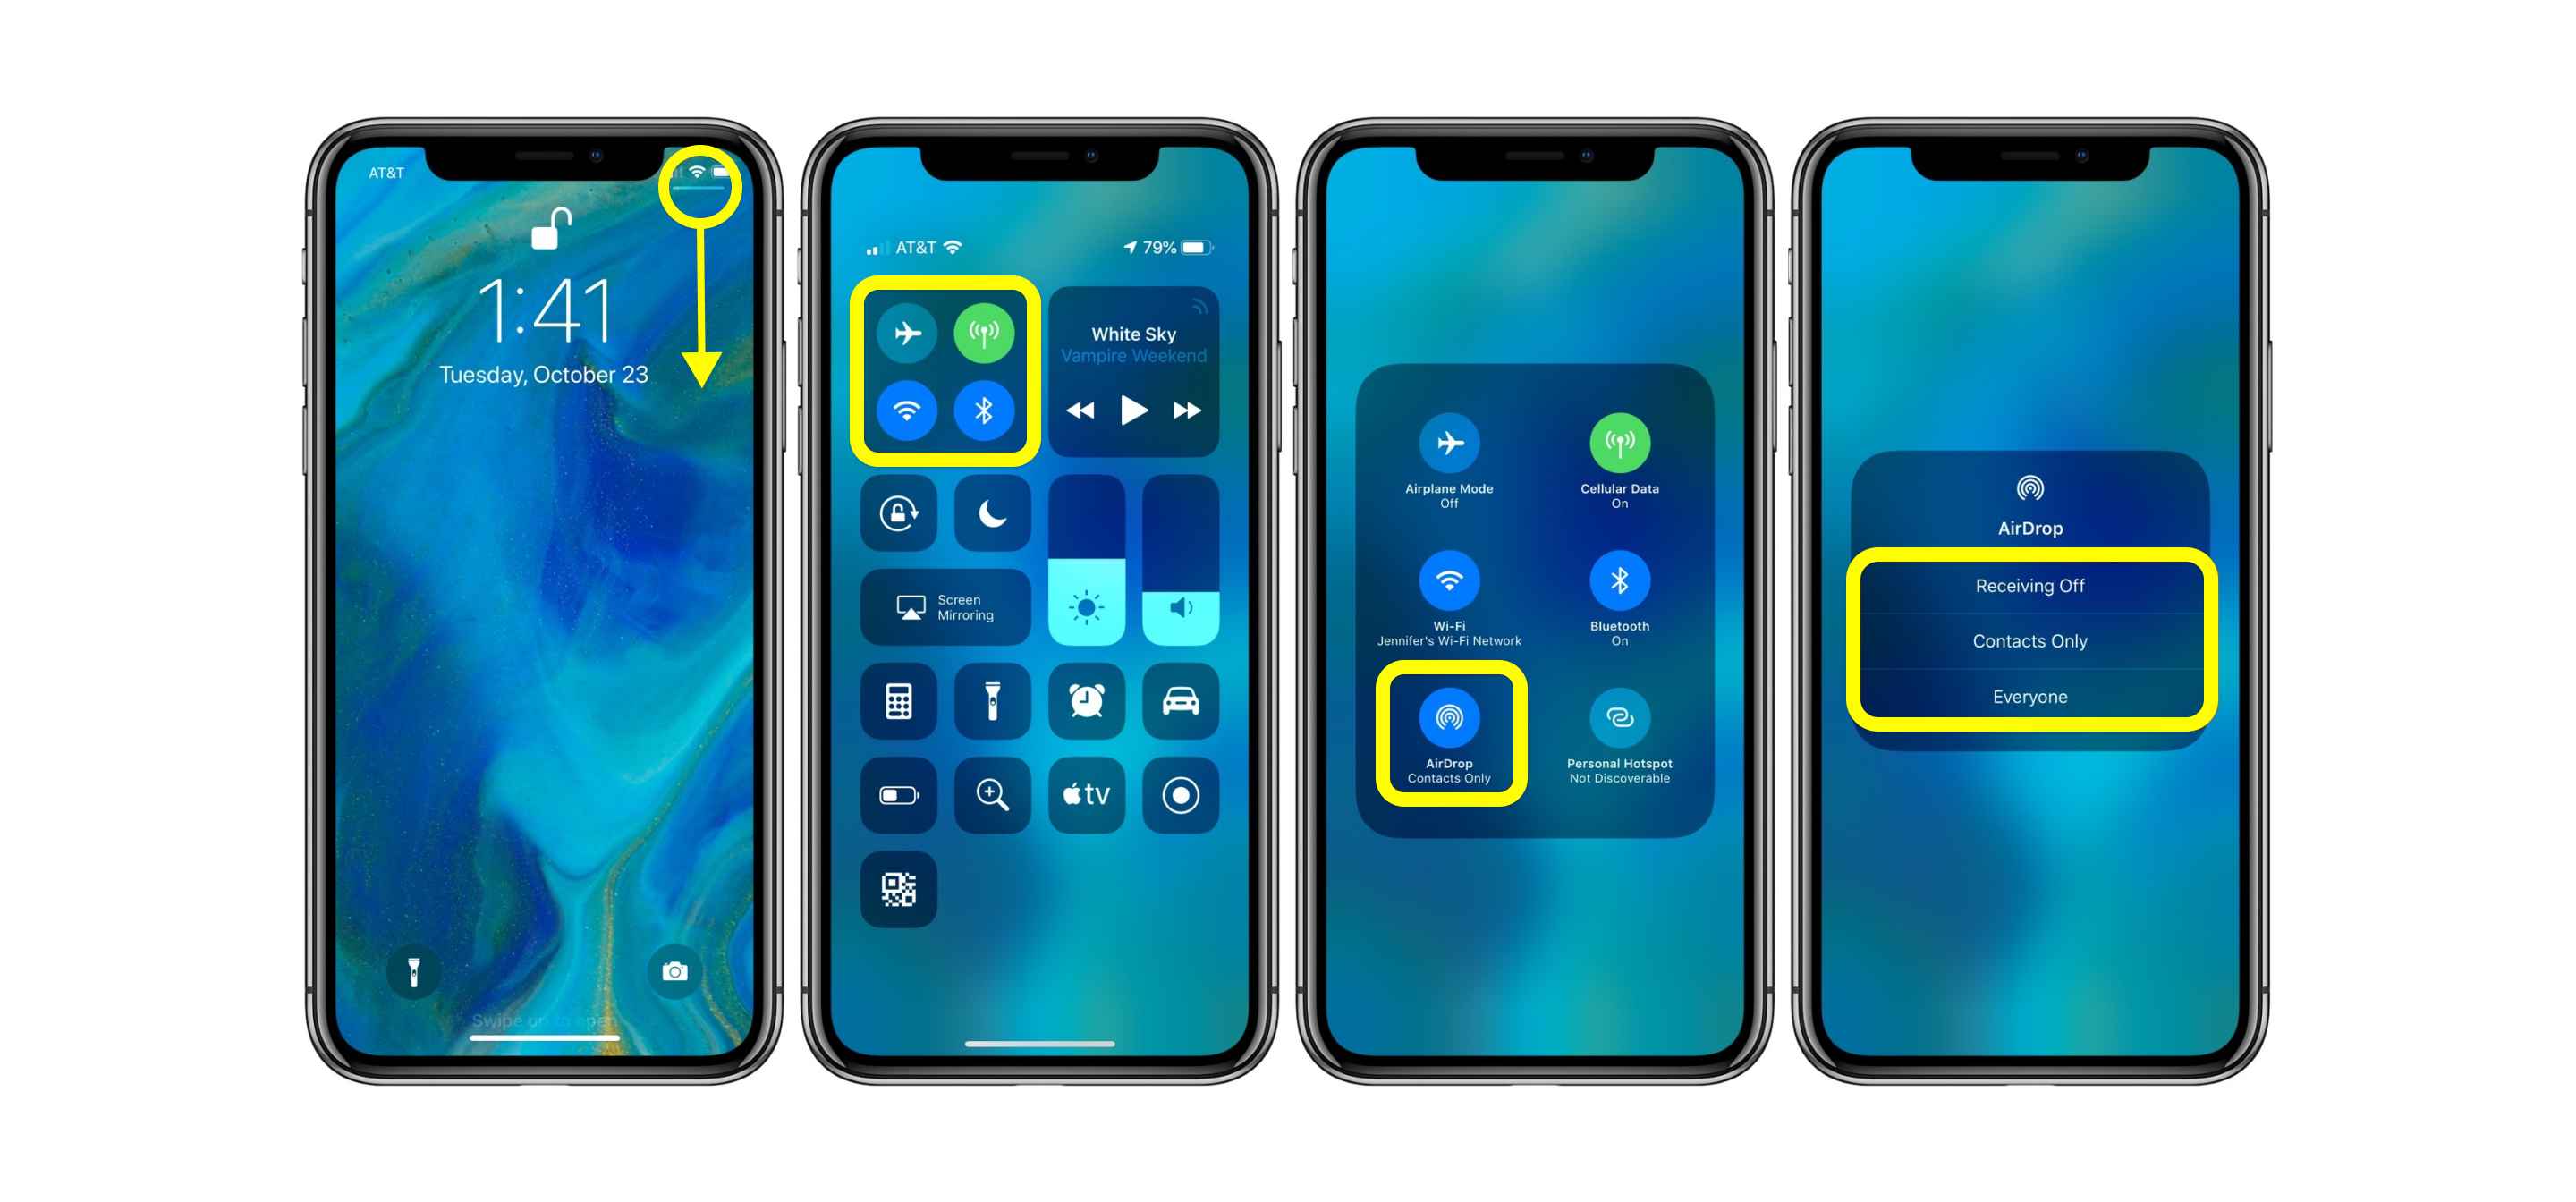
How to Turn on AirDrop on iPhone or iPad
- Launch the Control Center.
- 3D Touch or long press on the Wi-Fi button.
- Tap on AirDrop.
- Select ‘Contacts Only’ or ‘Everyone’.
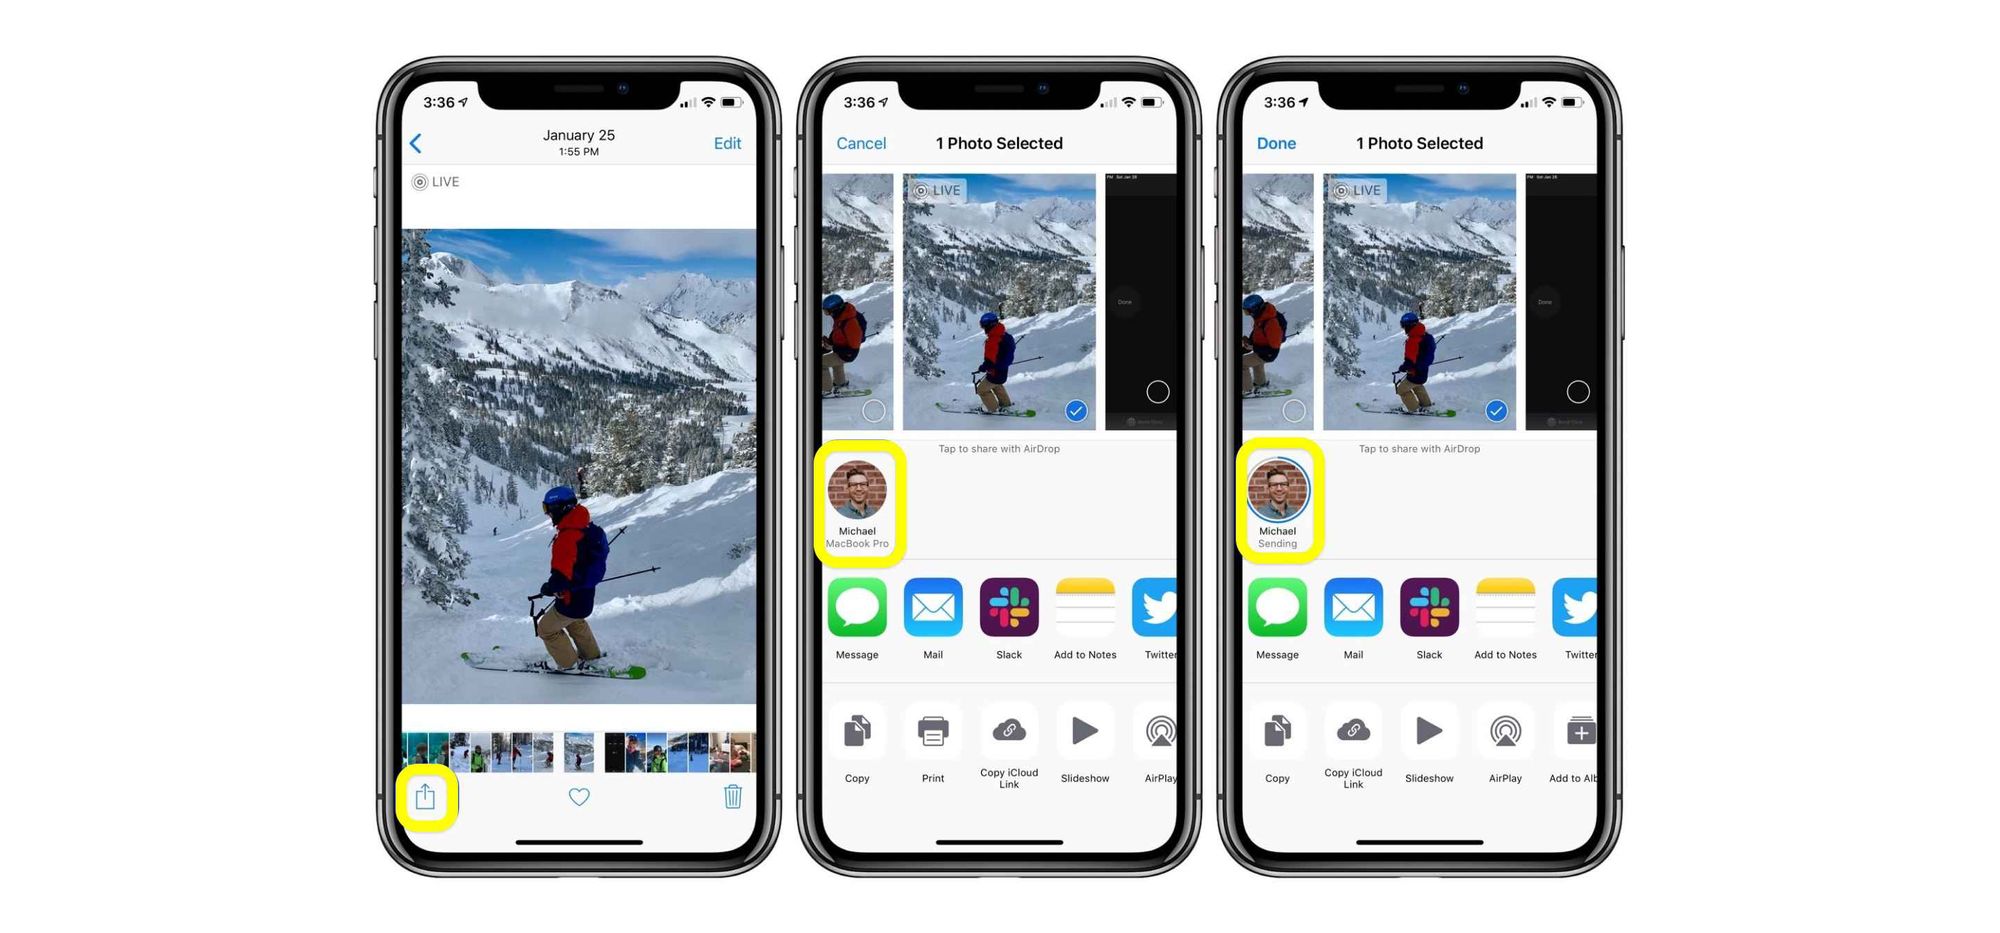
Sending files
- Find the file you want to send.
- Tap the Share button.
- Tap the AirDrop user you want to send the files to.
Receiving files
- Wait for the prompt.
- Click on Accept. Click Decline if you don’t recognize the sender.
- AirDrop will open the files on the app they were sent from.
How to Turn Off AirDrop
To avoid prank AirDrops, always turn it off when not sharing files with people you know.
On Mac
- Go to your Dock, and click on Finder.
- Click on AirDrop.
- Click on ‘Allow me to be discovered by.’
- Click ‘No One.’
On iPhone or iPad
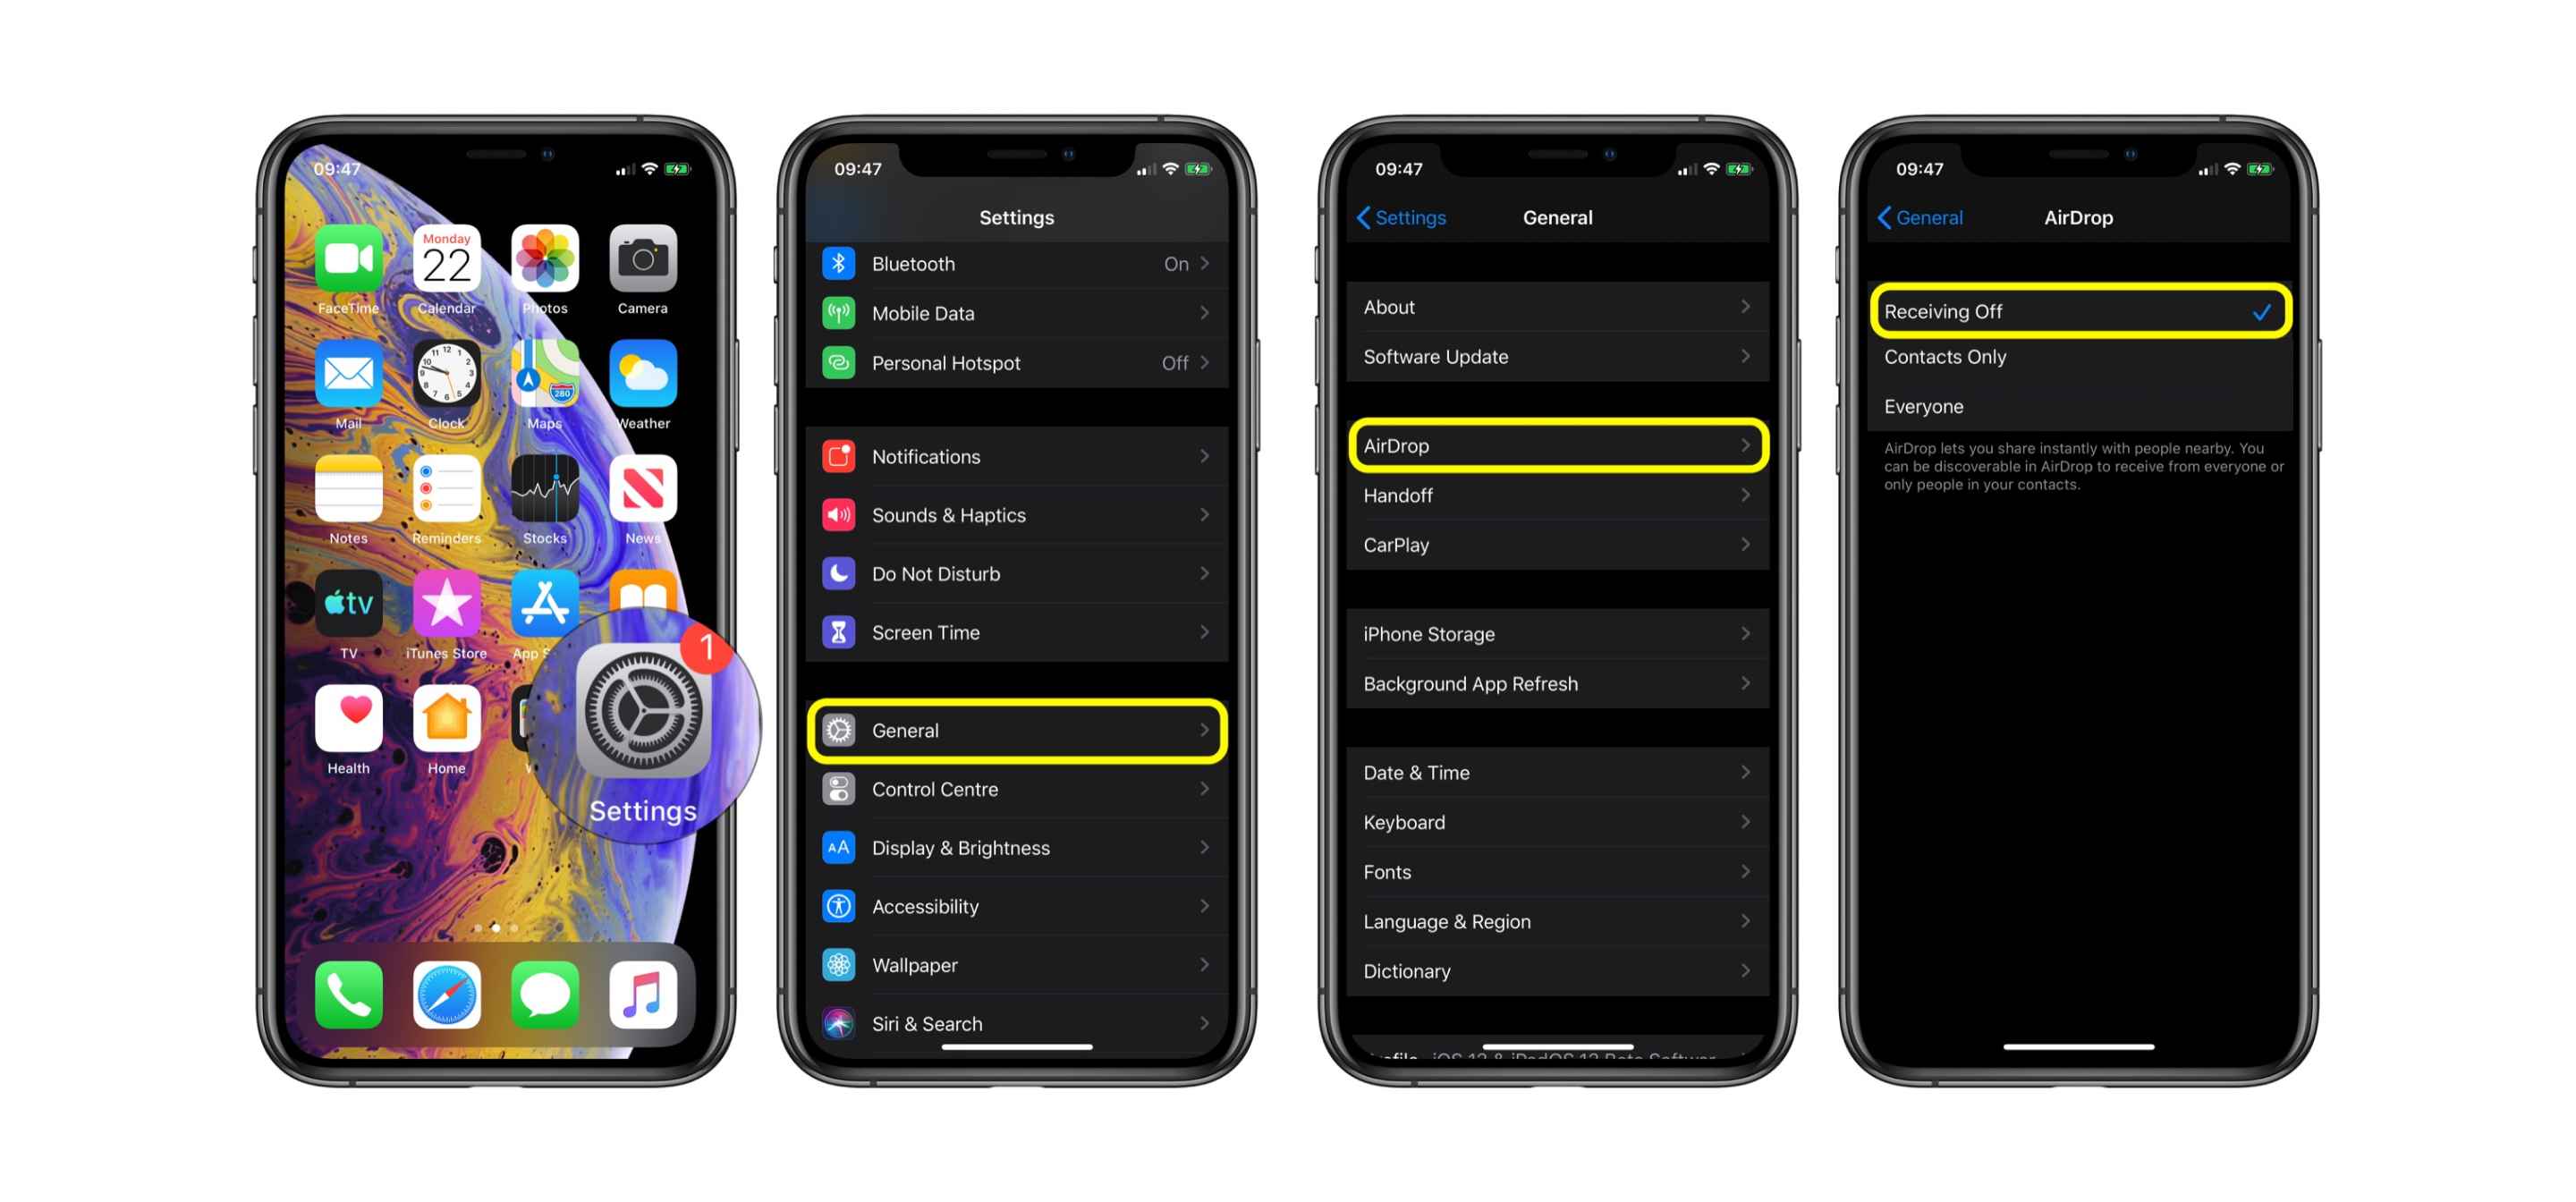
- Launch the Control Center.
- Tap AirDrop.
- Change status to ‘Receiving Off.’
Transfer Files Faster Through AirDrop
AirDrop definitely makes transferring files faster and easier. Make sure you know how to use and fully utilize this feature.

