
Want to keep prying eyes at bay when surfing the web? You might want to look into setting up a virtual private network (VPN).
A virtual private network (VPN) can protect you from some of the risks of using the internet. Cool, huh? I know what you’re thinking - what is a VPN? A VPN is a secure tunnel between your device and the internet.
In short: it connects your smartphone, tablet, or PC to another computer (server). This connection allows you to access the internet using that computer’s (server’s) internet connection.
Consequently, a VPN can help you achieve the following:
- Hide your location and IP.
- Prevent your data from being intercepted.
- Watch restricted content.
- Avoid throttling and spying.
- Access geo-locked deals on e-commerce sites.
Wondering how to use a VPN? Follow our guide below.
How to Set Up a VPN
OK, first things first. You’ll need to sign up with a VPN service. You can go with a paid or free VPN provider. They will give you the details you need to set up a connection. Here’s how to use a VPN on your device.
Setting Up a VPN In Windows 10
Your VPN provider may have a Windows app that does the setup automatically.
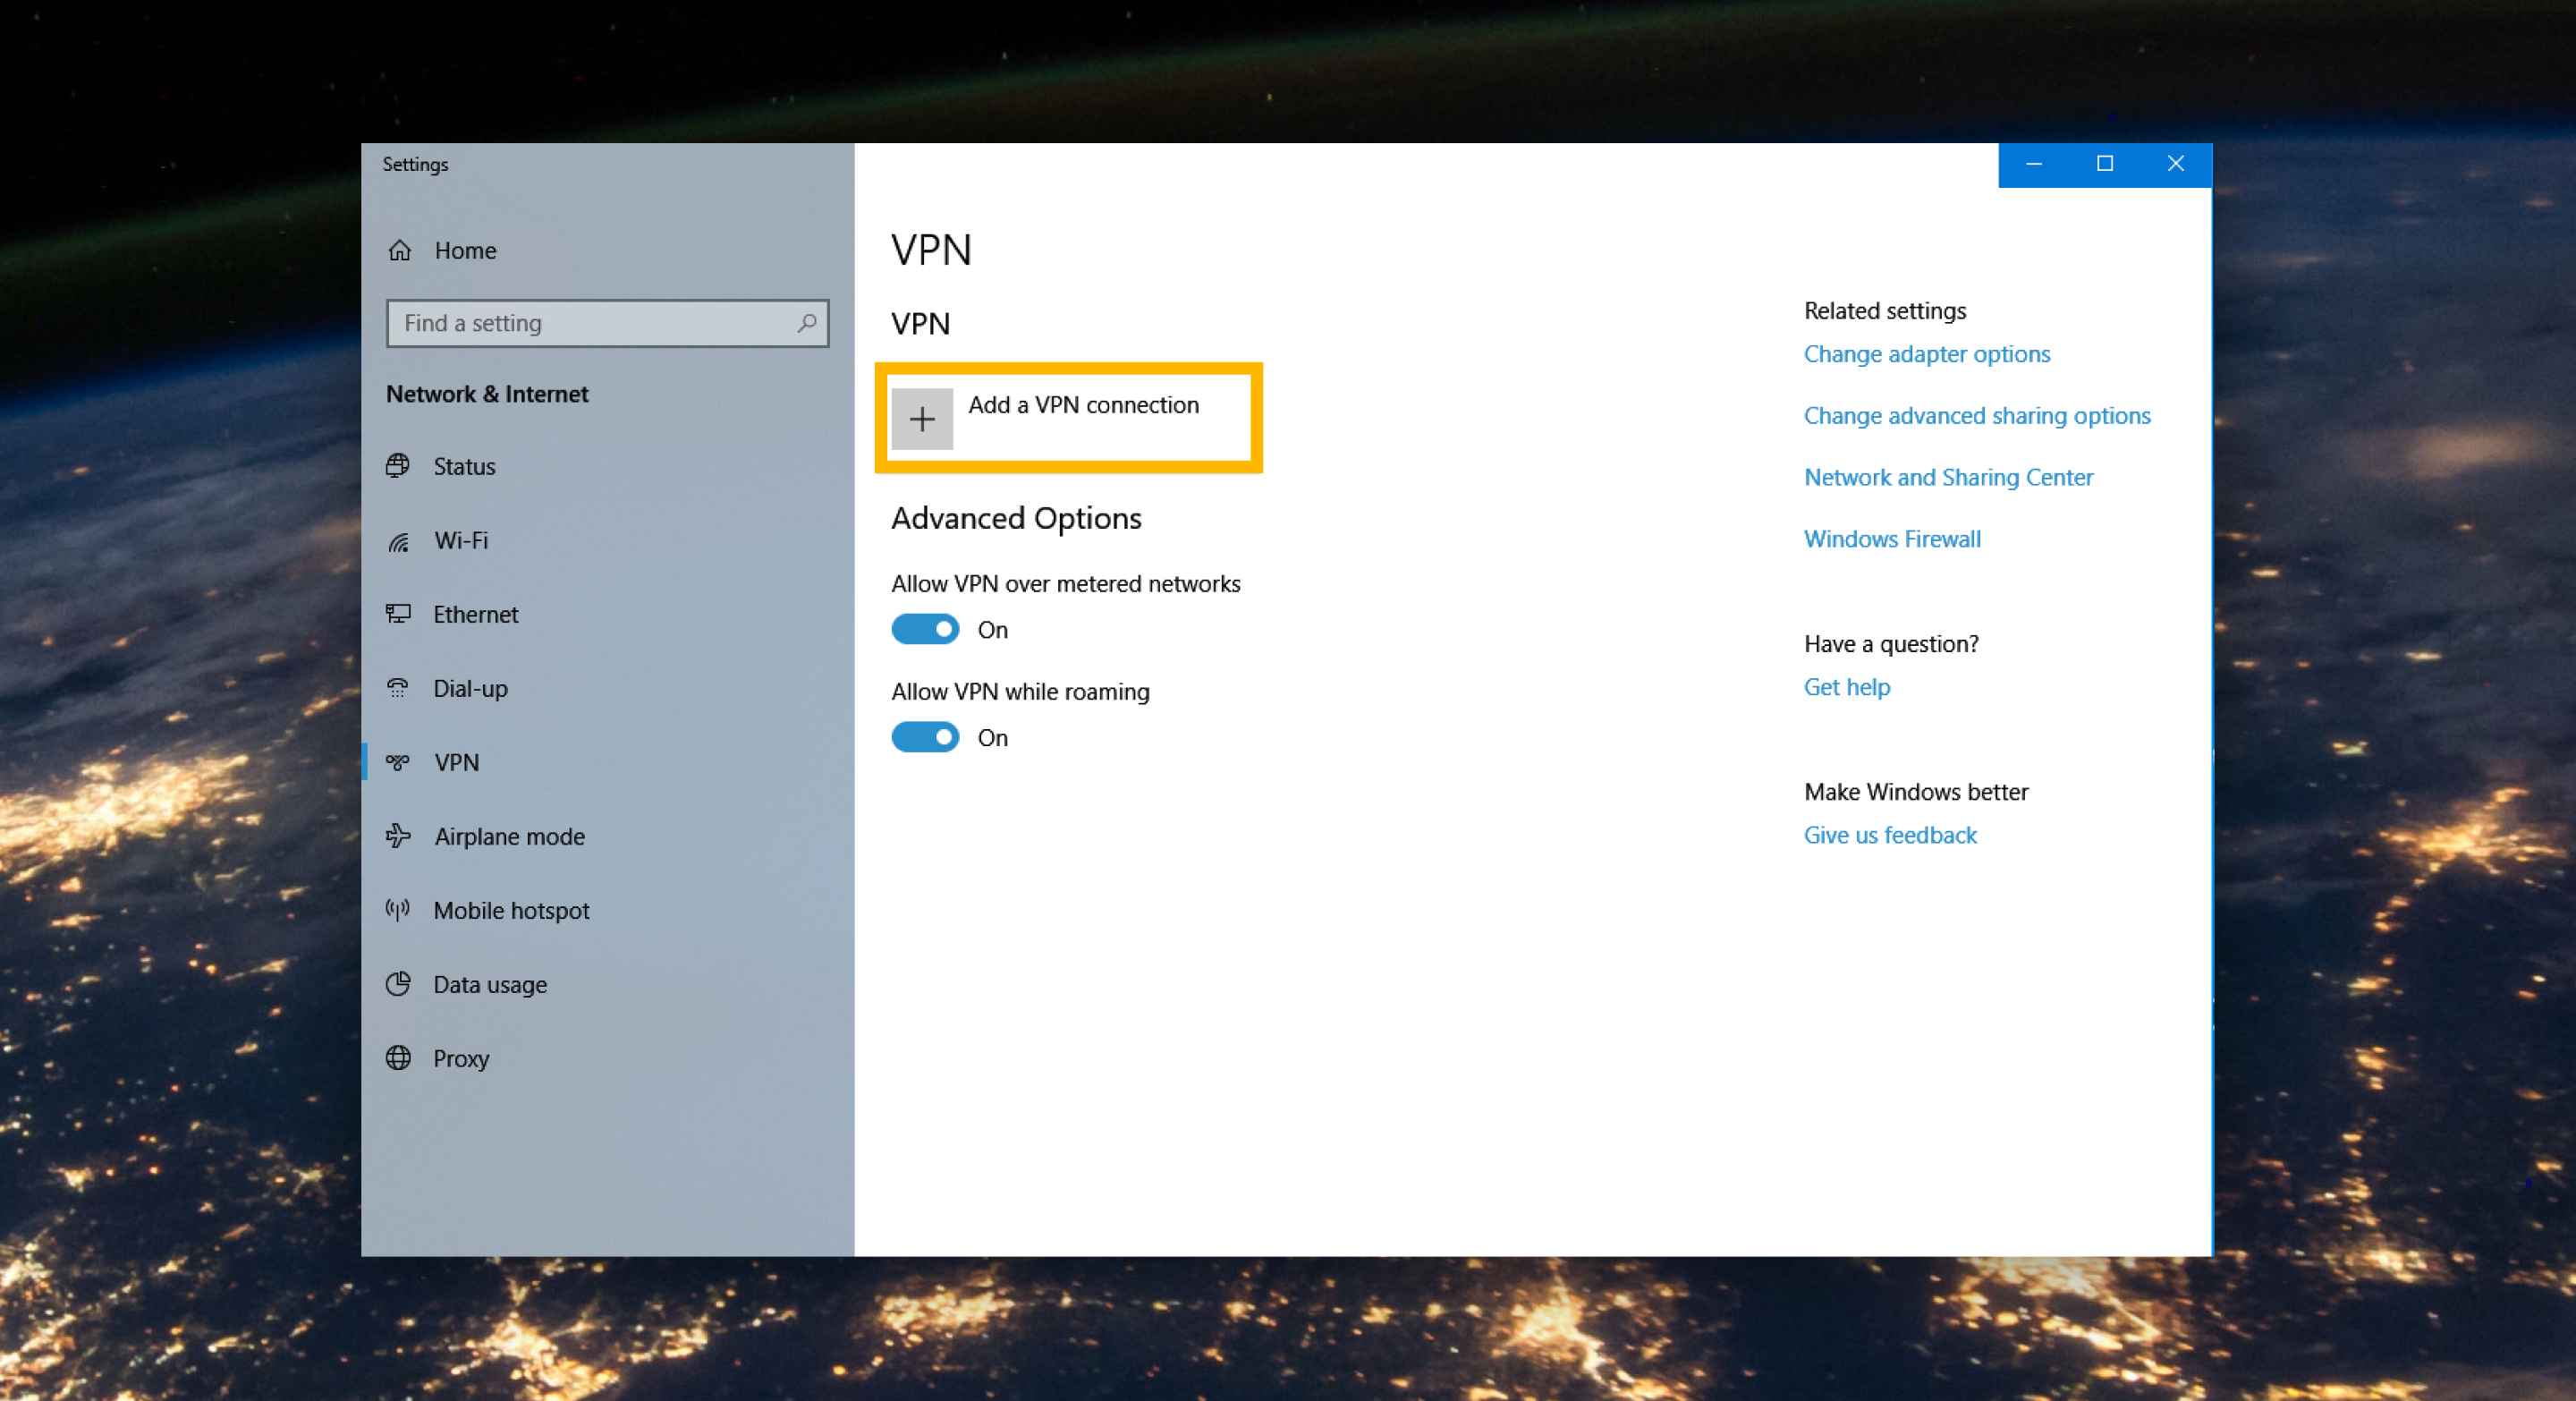
If you have to do it manually, here’s how to go about it:
- Click on the Windows button.
- Open Setting > Network & Internet > VPN.
- Click on Add a VPN connection.
- Assign a name to the VPN connection.
- Select the VPN type and enter your login details.
- Click Save.
Setting Up a VPN in Chrome OS
Download the extension for your VPN from Chrome Web Store or Google Play Store.
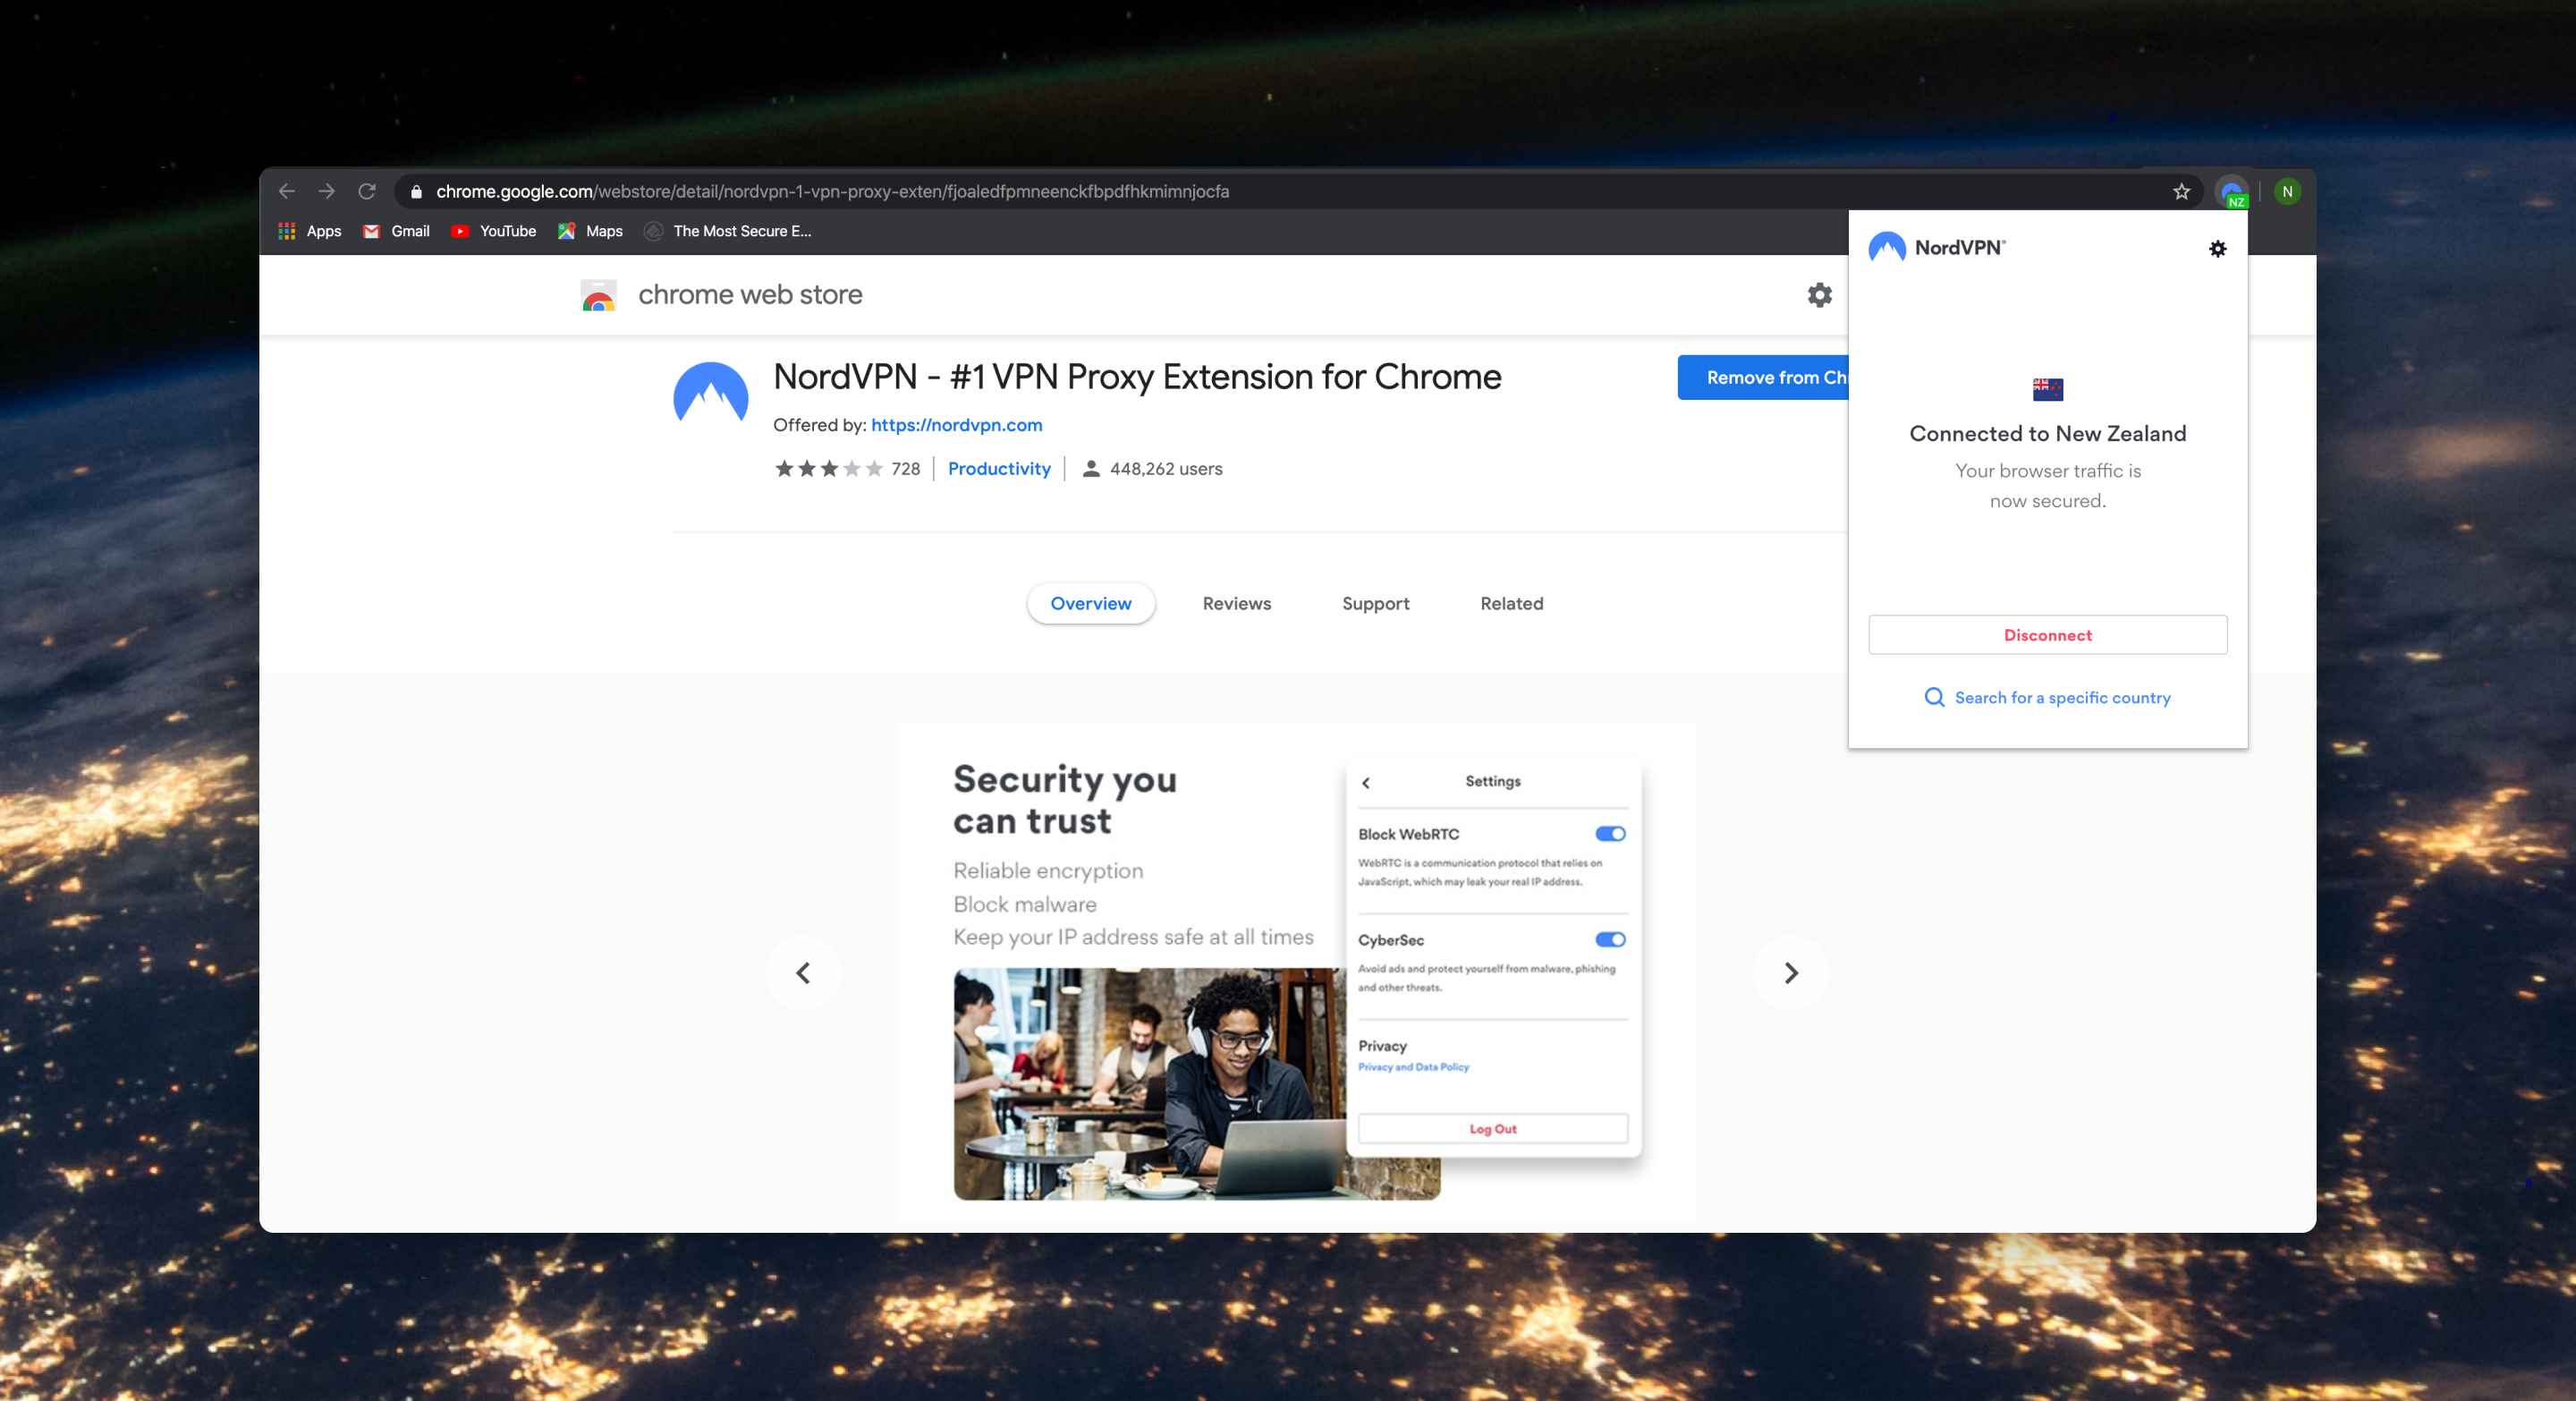
The set-up process should be straightforward with prompts at every step. But here’s how to do a manual set up:
- Go to Chrome Web Store and get an extension of the VPN you chose.
- Navigate to the lower right corner of your screen and click on Time > Settings.
- Click on Add Connection.
- Click on OpenVPN/L2TP
- Add the set-up details given by your VPN provider. They may include server hostname, service name, pre-shared key, provider type, username, and password.
- Click Connect.
If you have a VPN issued from your workplace, you might need to import a certificate. Here’s how to go about it. - Go to Chrome:// settings/certificates
- On the Authorities tab, select the certificate and click Import.
Setting Up a VPN in macOS
-
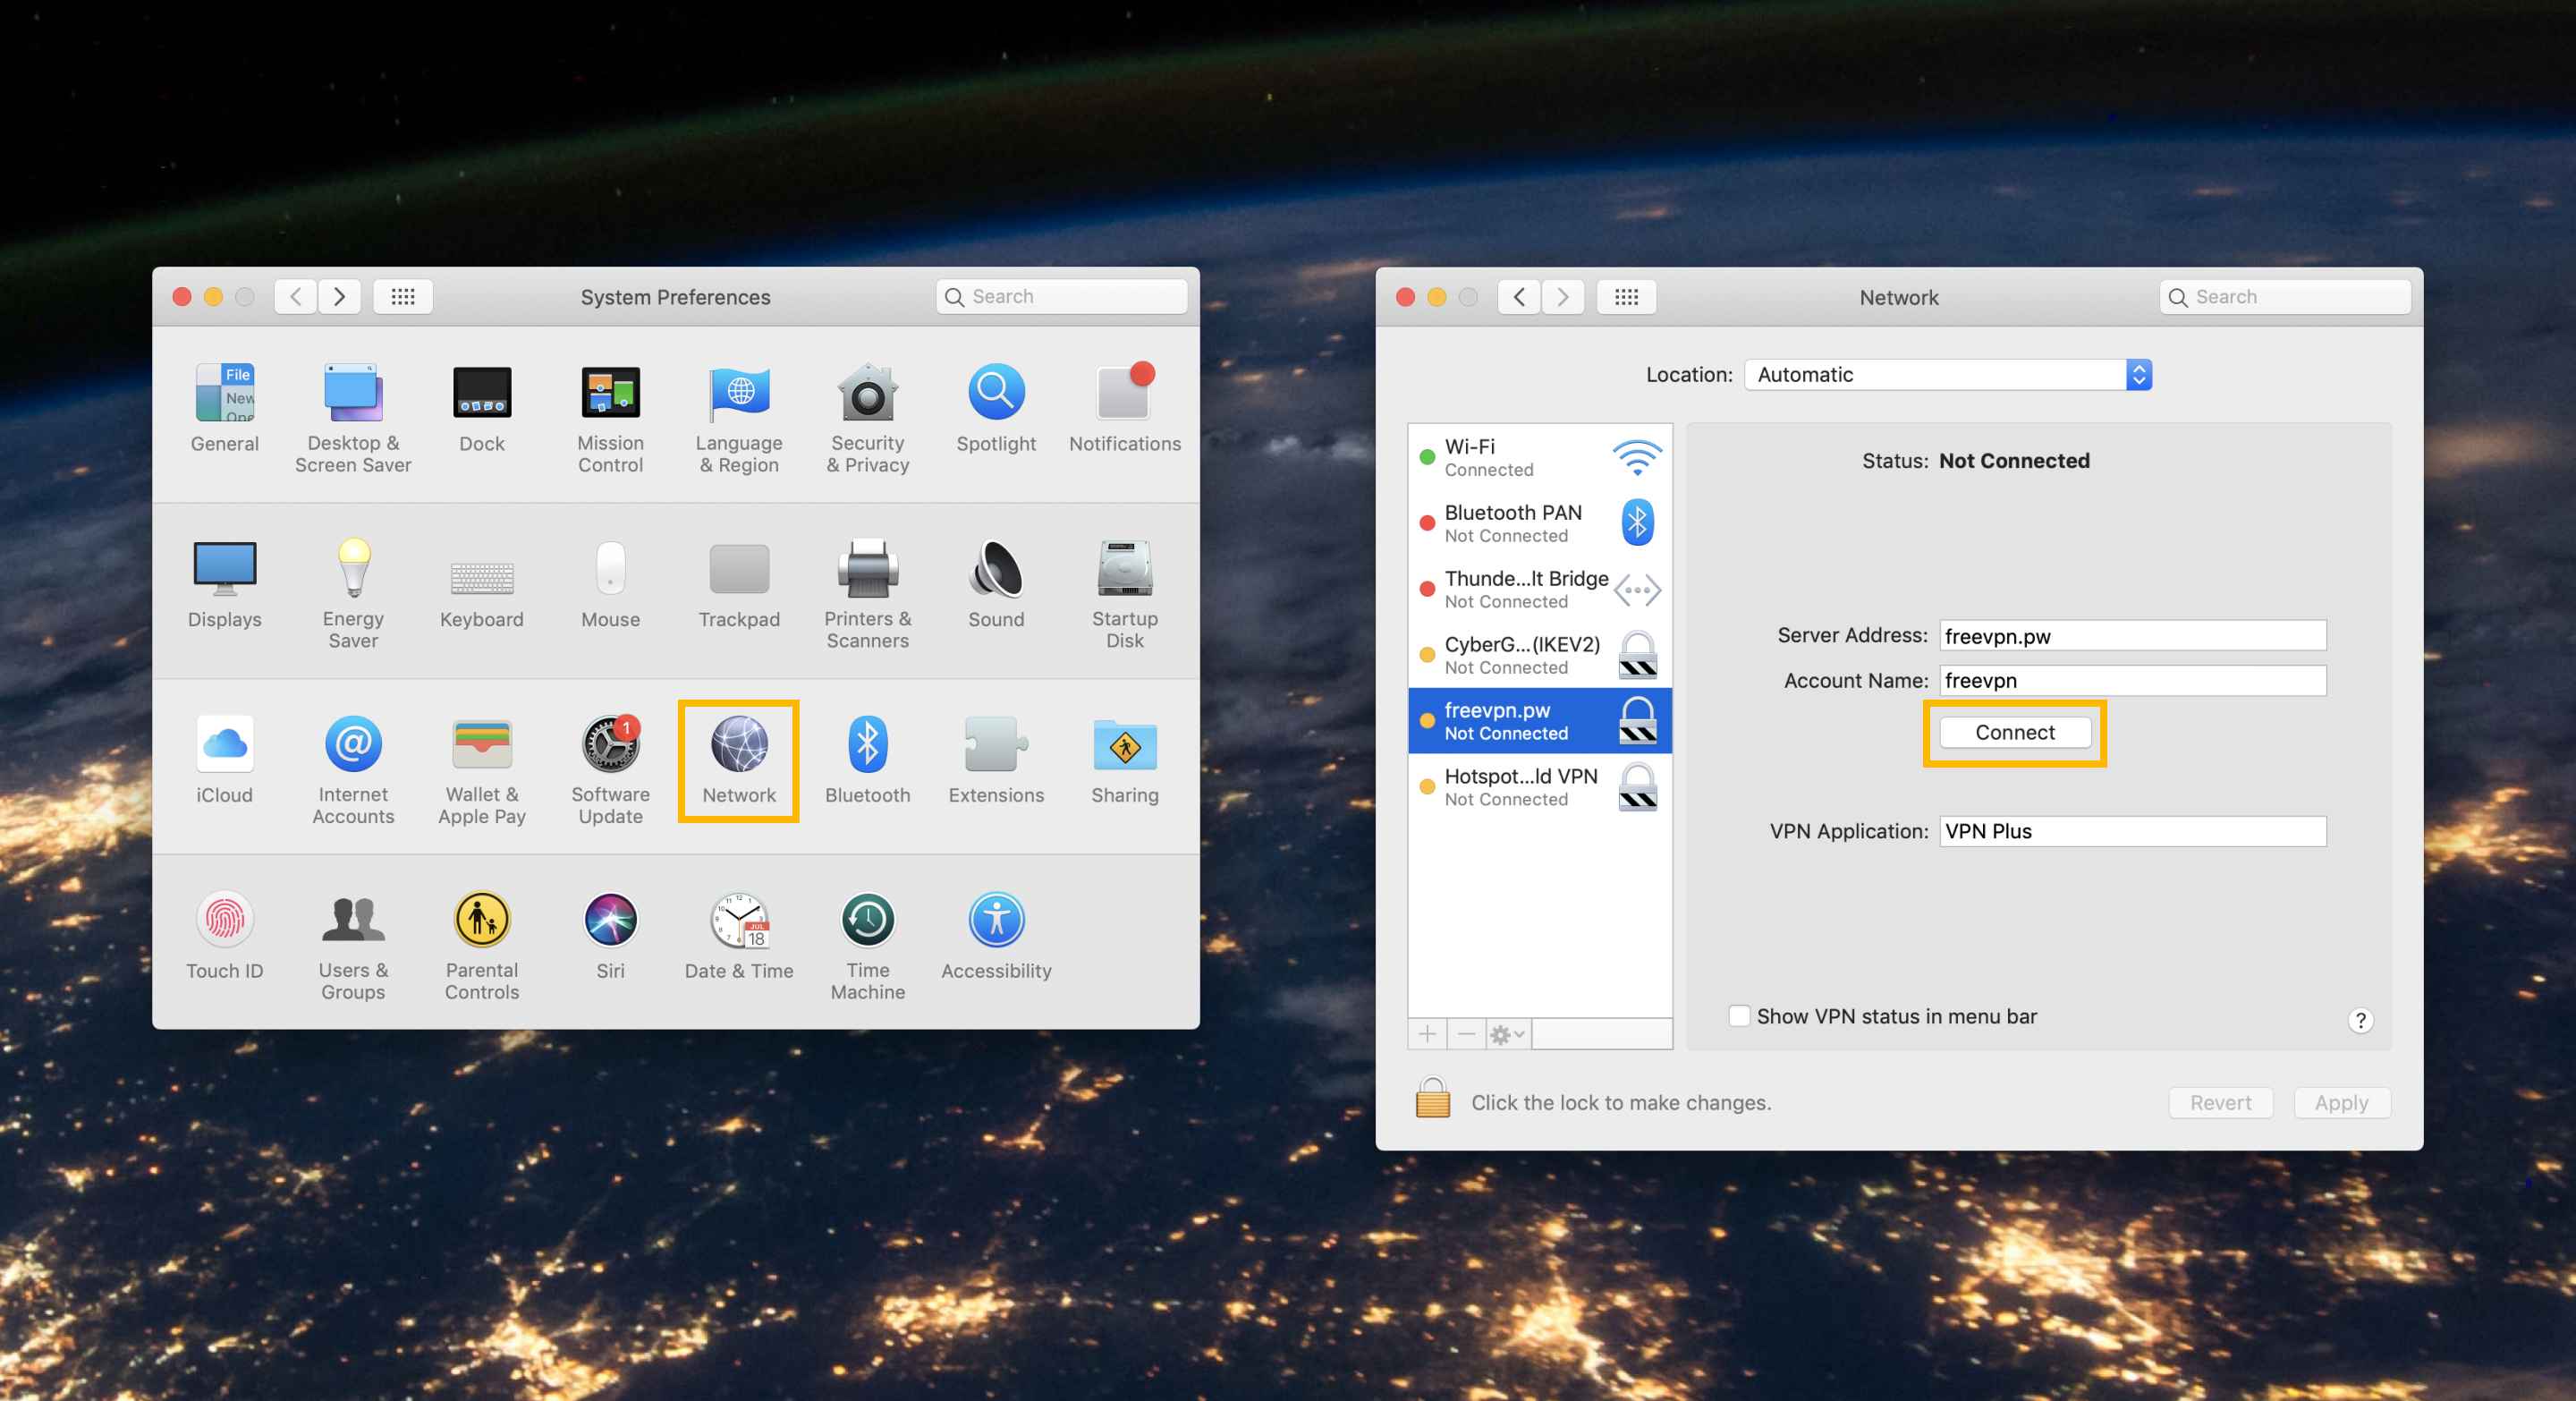
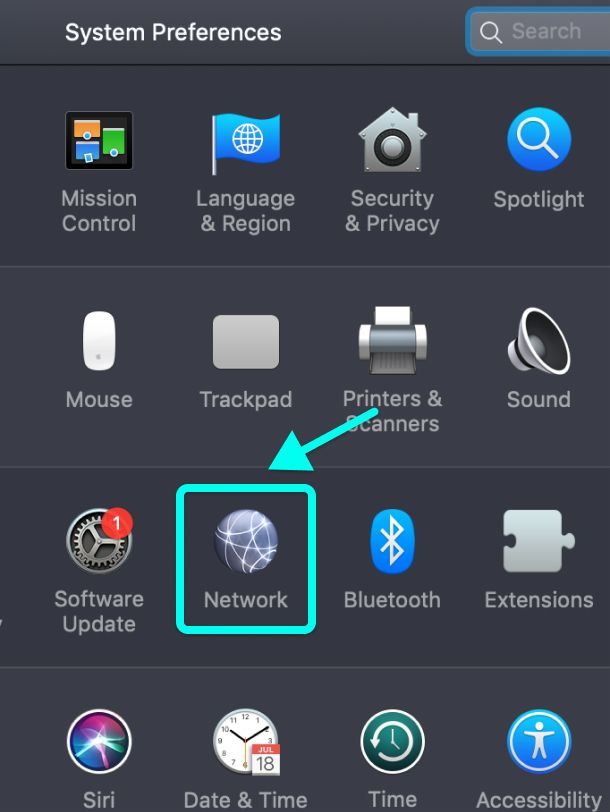 1. Go to Start > System Preferences > Network.
-
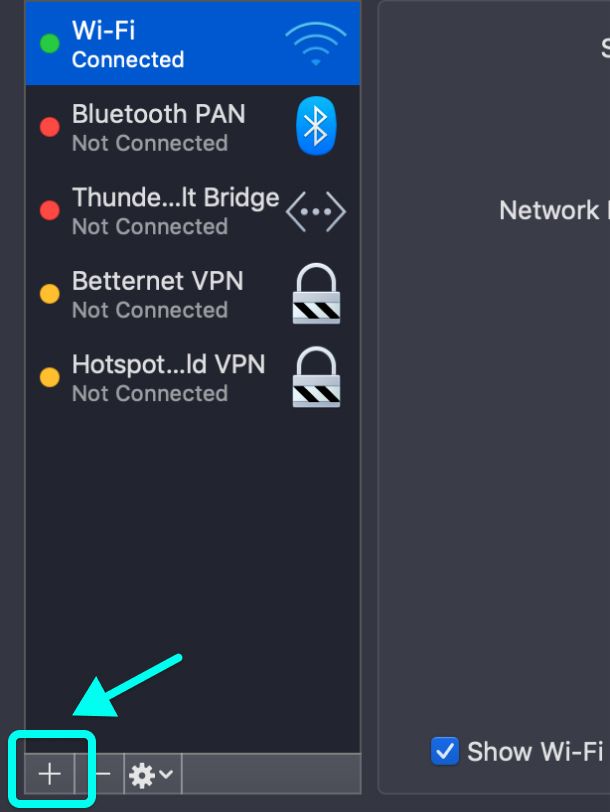 2. Click the Plus button on the bottom left of the screen.
-
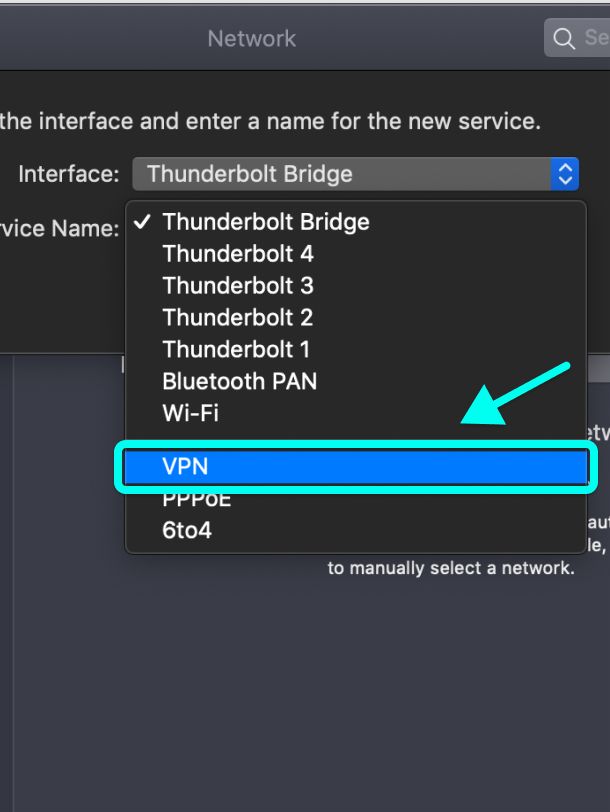 3. On the drop-down menu, select VPN.
-
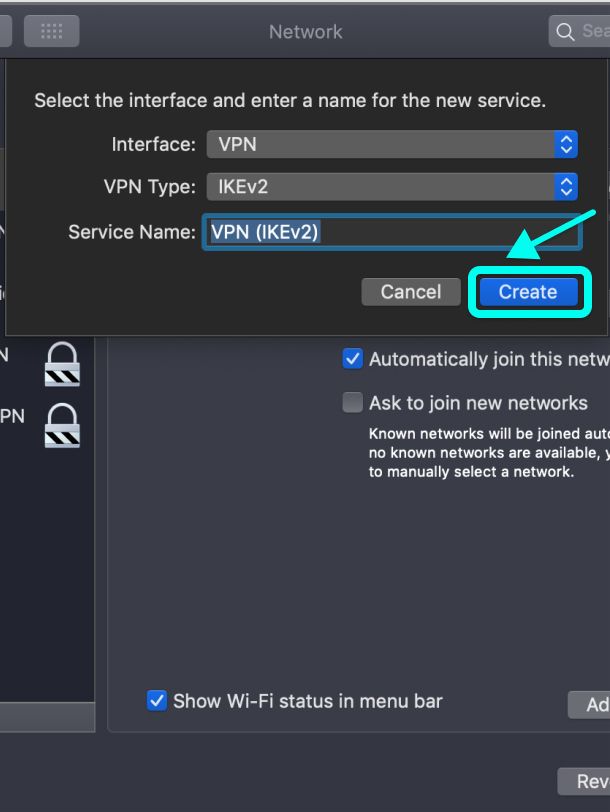 4. Click on Create.
-
 5. Fill out the details that came with the VPN. These include the server address, local ID, and remote ID.
-
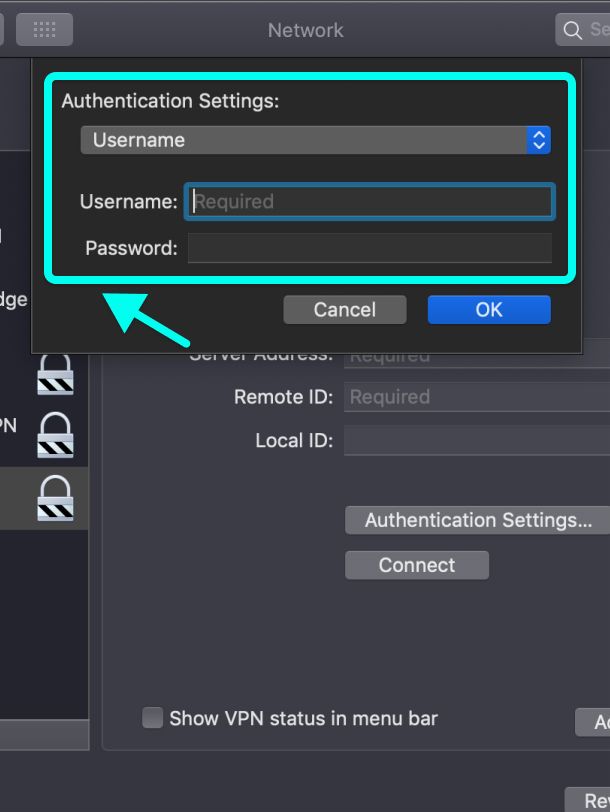 6. Click on Authentication Settings. Here you’ll enter your login details. Click OK and Connect.
Setting Up a VPN in iOS
You’ve selected the best VPN app from the App Store. Setting it up should be a breeze.
If you want to do it manually, here’s how to go about it:
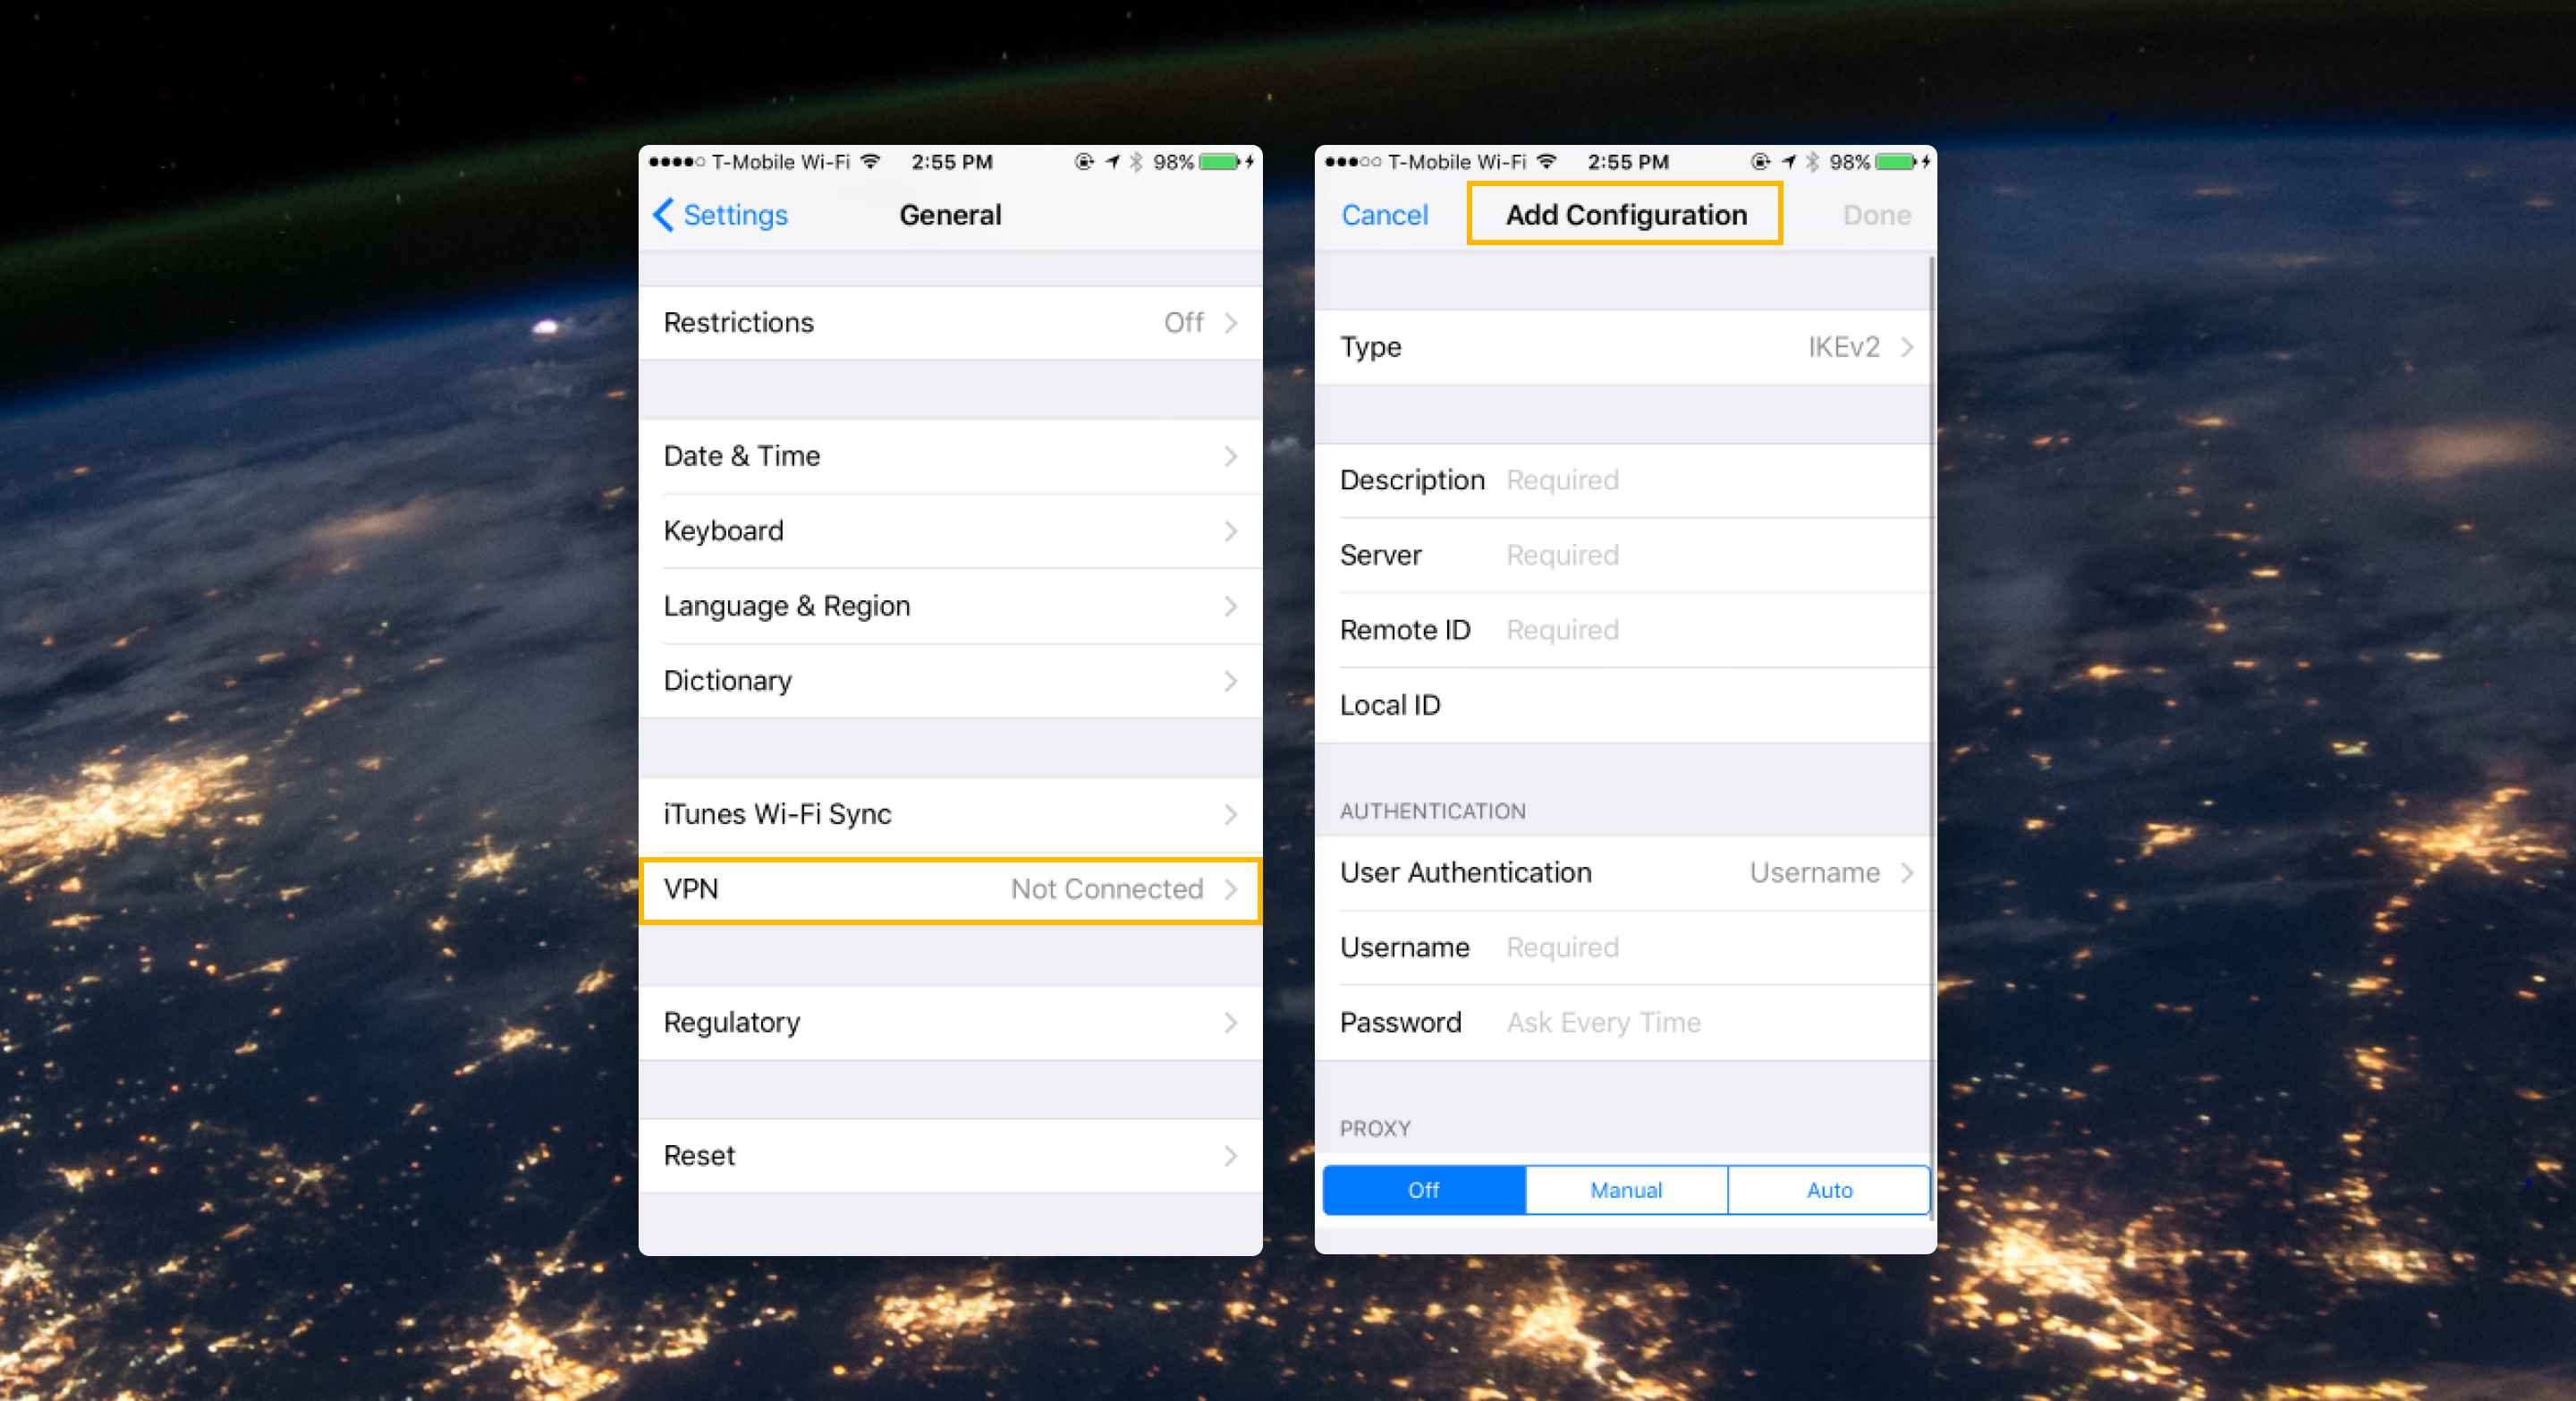
- Go to Settings > General.
- Select VPN
- Click on Add VPN Configuration.
- Under Type, select a security protocol. This will depend on the VPN you chose.
- Go back to Add VPN Configuration. Add the description, remote ID, server, and local ID.
- Enter your login details.
- Click Done.
Setting Up a VPN in Android
Here’s how to manually set up a VPN in Android.
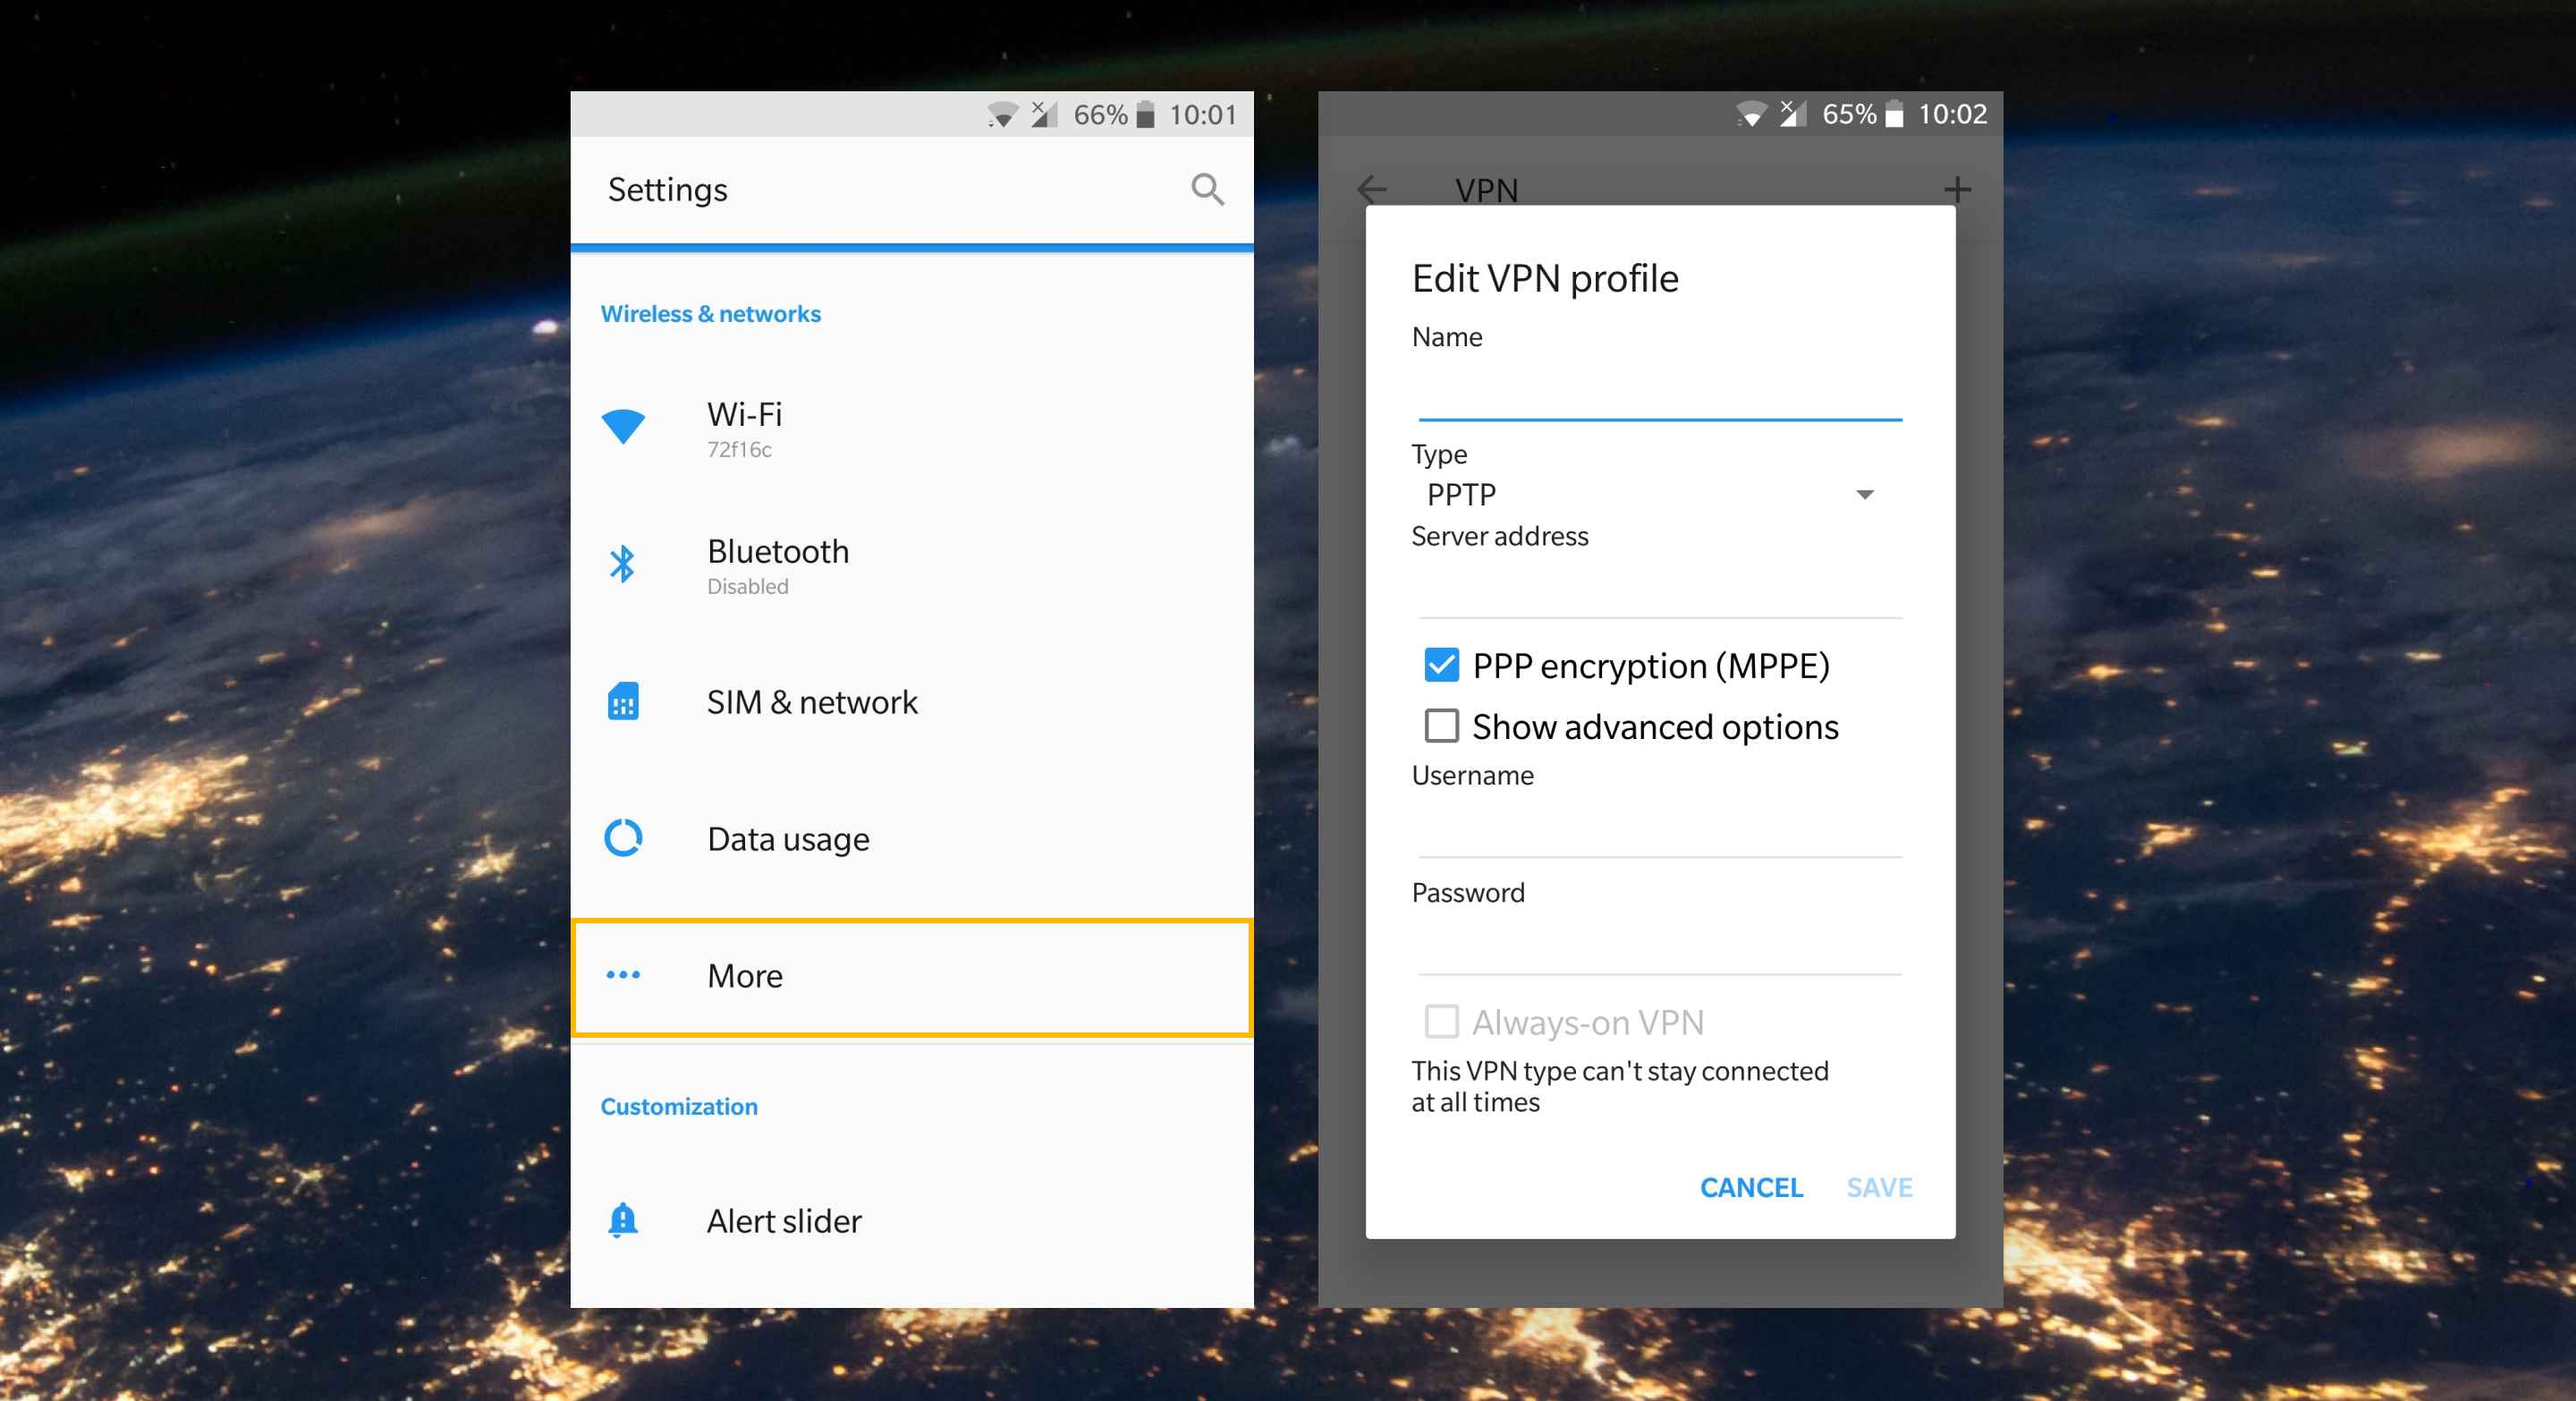
- Go to Settings > Network & Internet > Advanced > VPN.
- Create your VPN profile by adding the VPN name, type, and Server address. Click Save.
- Tap on the name of your VPN. You’ll be prompted to enter your name and password to log in.
- Click Connect.
- Enter the server address, VPN name, VPN type, username, and password.
- Click Save.
Conclusion
Now that you’ve learned how to use a VPN, you can now access your favorite content without restrictions or worrying about a security breach.
Looking for a VPN? Check for the Best VPN services in 2020. Alternatively, you can apply for a NordVPN deal (limited time offer) right away. This page is always up to date.